
苹果版本说明
| 版本 | 发行时间 | 最新版本 |
|---|---|---|
| macOS Monterey | 2021 | 12.3.1 |
| macOS Big Sur | 2020 | 11.6.5 |
| macOS Catalina | 2019 | 10.15.7 |
一、制作macos镜像
这一步为非必须的,如果想省事可以直接去下载已经制作好的BigSur-recovery.img和Monterey-recovery.img,点击下载。
在Mac上需要安装xcode环境,在linux上需要安装qemu-utils环境,然后下载GitHub上的一个OSX-KVM仓库,这个仓库里有bigsur和monterey制作执行脚本。
macOS上操作
xcode-select --install git clone https://github.com/thenickdude/OSX-KVM.git cd OSX-KVM/scripts # 也可以cd monterey cd bigsur # make Monterey-recovery.img make BigSur-full.imgLinux上操作
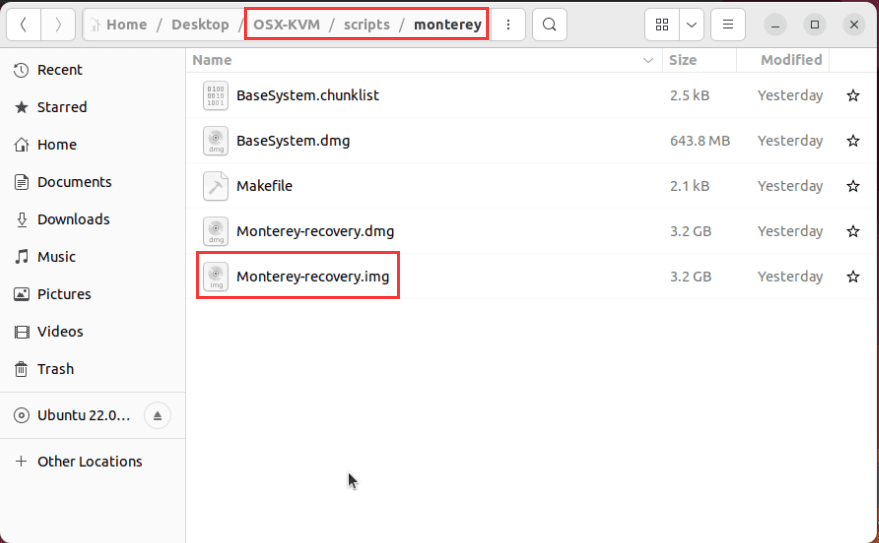
apt install qemu-utils make git clone https://github.com/thenickdude/OSX-KVM.git cd OSX-KVM/scripts # 也可以cd monterey cd bigsur # make Monterey-recovery.img make BigSur-recovery.imgmake命令执行完成之后,在OSX-KVM/scripts/bigsur或OSX-KVM/scripts/monterey的目录下,会生成对应的img文件:BigSur-recovery.img和Monterey-recovery.img。这两个文件就是我们的系统还原安装包,要上传到PVE的镜像中的。下面这个是我在Ubuntu上制作的Monterey镜像,这个版本的MacOS也比较新,下面的操作均以monterey为主。
准备OpenCore镜像
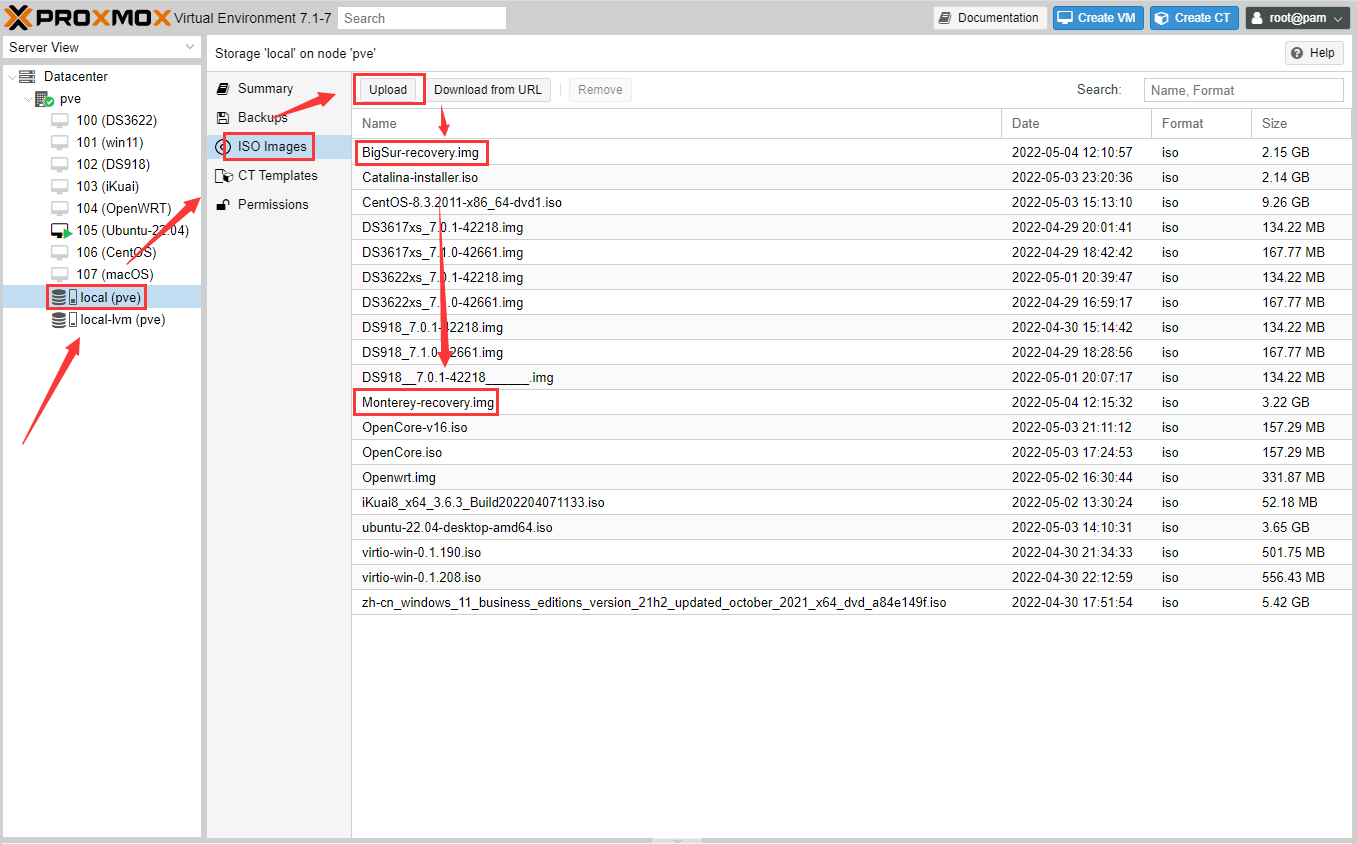
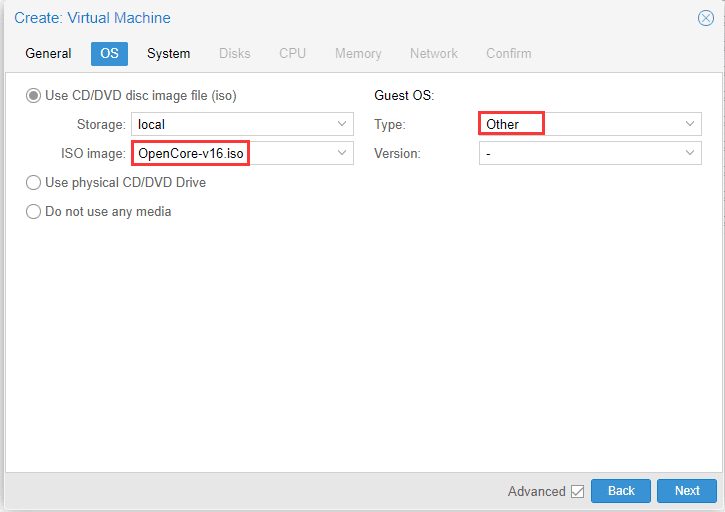
下载最新版本的OpenCore.iso.gz文件,解压后,将对应ISO文件上传至Proxmox的ISO存储目录(通常为/var/lib/vz/template/iso),目前最新版为OpenCore-v16.iso。
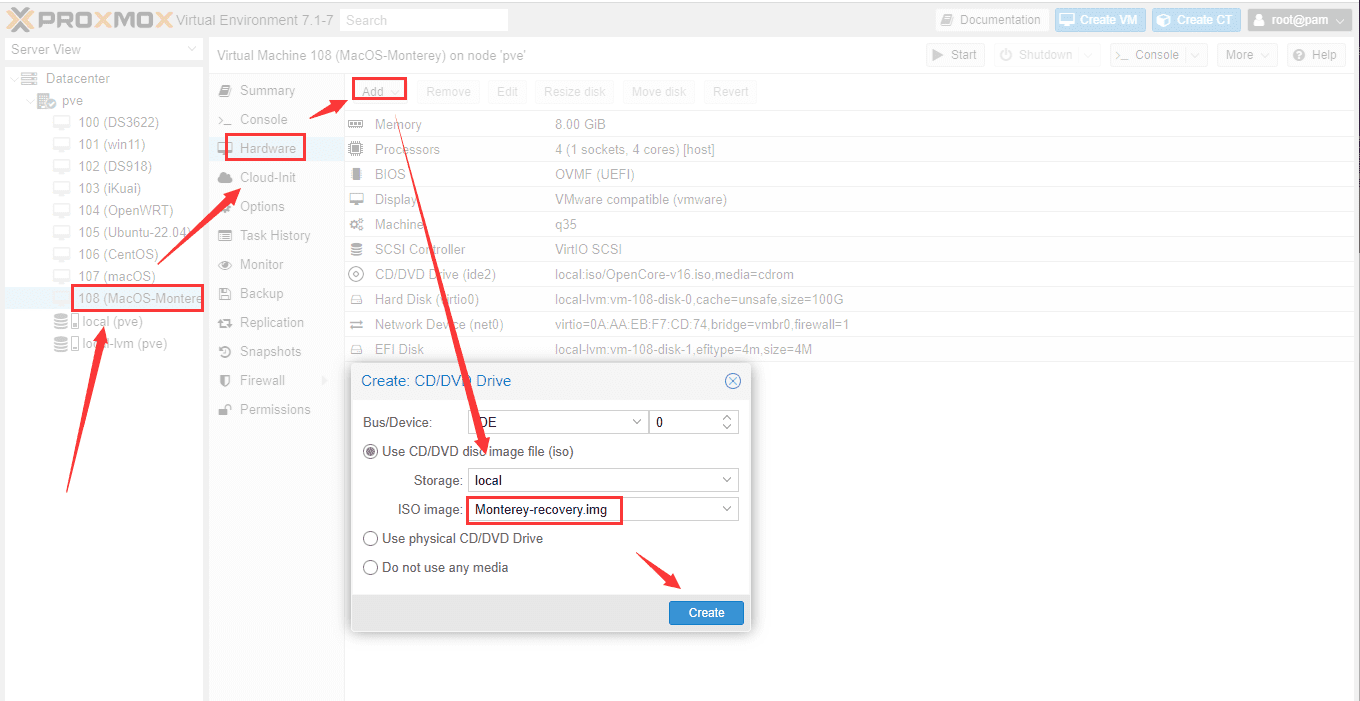
把BigSur-recovery.img或Monterey-recovery.img以及OpenCore-v16.iso上传到PVE的镜像中。
获取OSK身份验证密钥
macOS检查它是否在真正的Mac硬件上运行,并拒绝在第三方硬件上启动。您可以通过从真实Mac硬件中读取身份验证密钥(OSK 密钥)来解决此问题。将下面代码保存为smc_read.c,并在改文件的路径下,运行gcc -o smc_read smc_read.c -framework IOKit,前提是mac必须安装了xcode环境。
/* * smc_read.c: Written for Mac OS X 10.5. Compile as follows: * * gcc -Wall -o smc_read smc_read.c -framework IOKit */ #include <stdio.h> #include <IOKit/IOKitLib.h> typedef struct { uint32_t key; uint8_t __d0[22]; uint32_t datasize; uint8_t __d1[10]; uint8_t cmd; uint32_t __d2; uint8_t data[32]; } AppleSMCBuffer_t; int main(void) { io_service_t service = IOServiceGetMatchingService(kIOMasterPortDefault, IOServiceMatching("AppleSMC")); if (!service) return -1; io_connect_t port = (io_connect_t)0; kern_return_t kr = IOServiceOpen(service, mach_task_self(), 0, &port); IOObjectRelease(service); if (kr != kIOReturnSuccess) return kr; AppleSMCBuffer_t inputStruct = { 'OSK0', {0}, 32, {0}, 5, }, outputStruct; size_t outputStructCnt = sizeof(outputStruct); kr = IOConnectCallStructMethod((mach_port_t)port, (uint32_t)2, (const void*)&inputStruct, sizeof(inputStruct), (void*)&outputStruct, &outputStructCnt); if (kr != kIOReturnSuccess) return kr; int i = 0; for (i = 0; i < 32; i++) printf("%c", outputStruct.data[i]); inputStruct.key = 'OSK1'; kr = IOConnectCallStructMethod((mach_port_t)port, (uint32_t)2, (const void*)&inputStruct, sizeof(inputStruct), (void*)&outputStruct, &outputStructCnt); if (kr == kIOReturnSuccess) for (i = 0; i < 32; i++) printf("%c", outputStruct.data[i]); printf("\n"); return IOServiceClose(port); }行gcc -o smc_read smc_read.c -framework IOKit会生成一个smc_read的可执行文件,点击运行可以获得OSK。
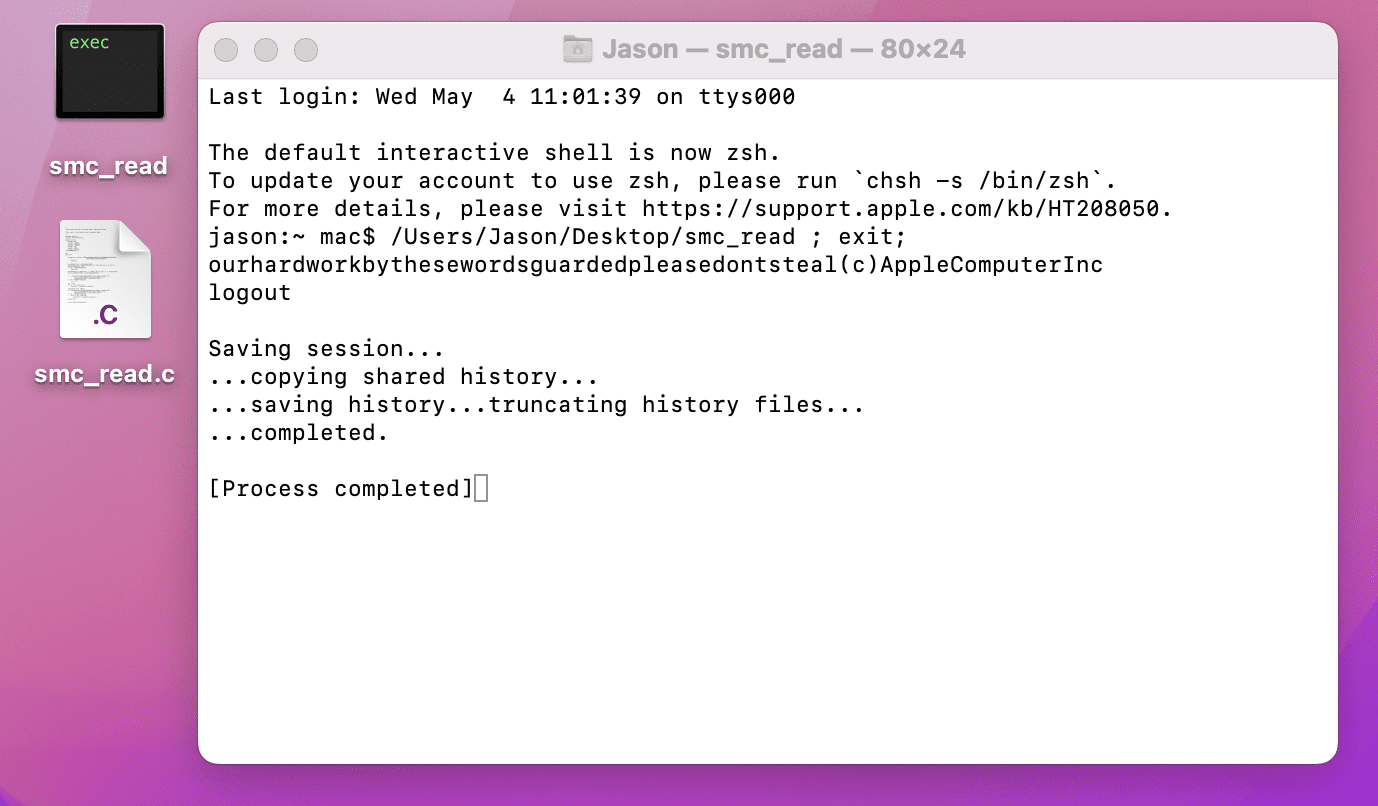
这里提供一下这个OSK:ourhardworkbythesewordsguardedpleasedontsteal(c)AppleComputerInc
二、配置Monterey虚拟机
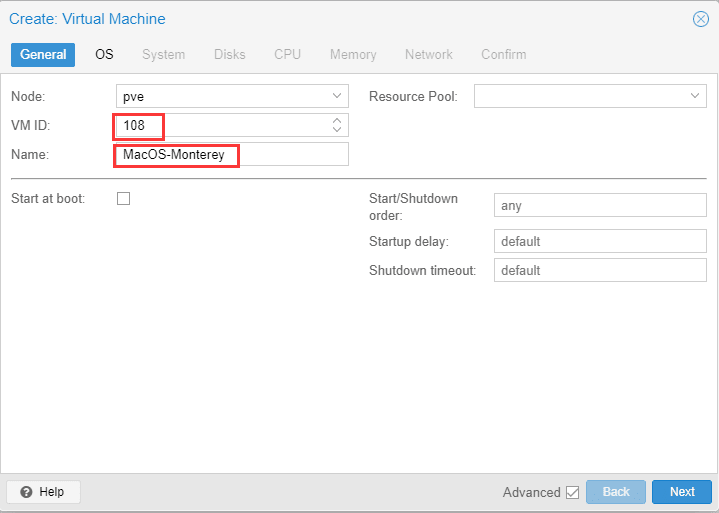
创建一个MacOS-Monterey的虚拟机。
os选择我们上传过来的
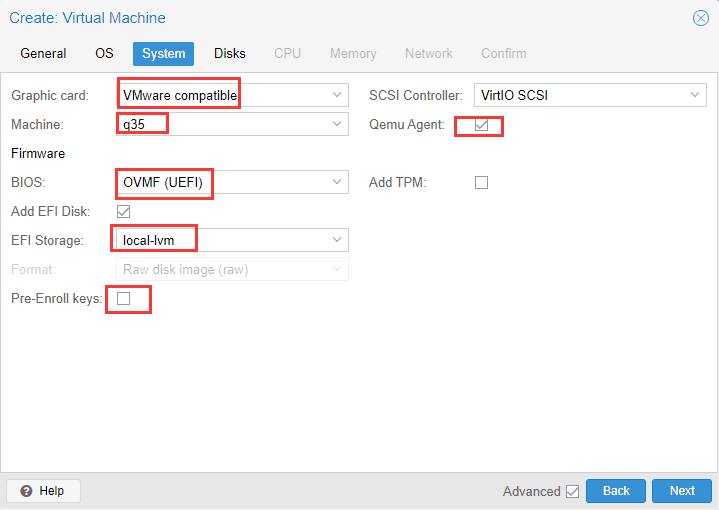
这个配置是关键,每一项都安装下面的来。
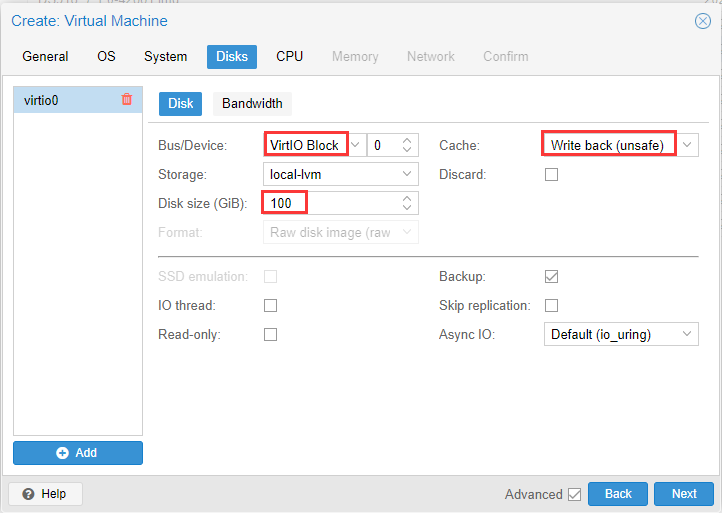
硬盘配置如下,给了100G。
CPU给4核。

内存配置8G。

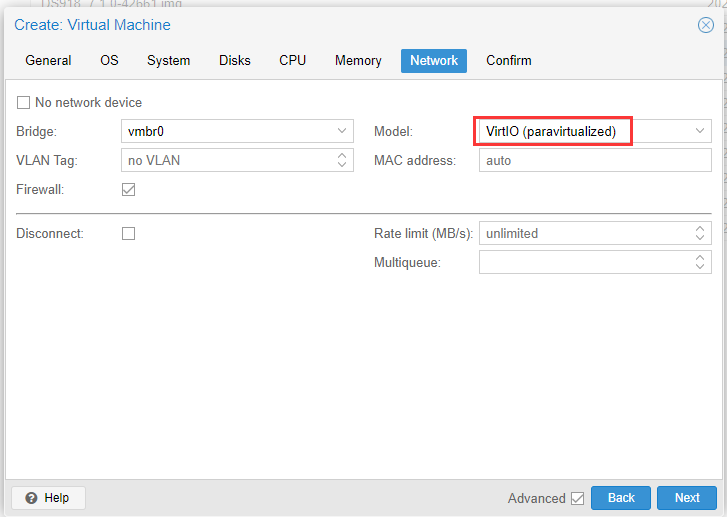
网络这里配置成VirtIO(paravirtualized)。
确认并完成
把安装的镜像文件以CD/DVD的方式添加过来。
三、macos虚拟机启动项配置
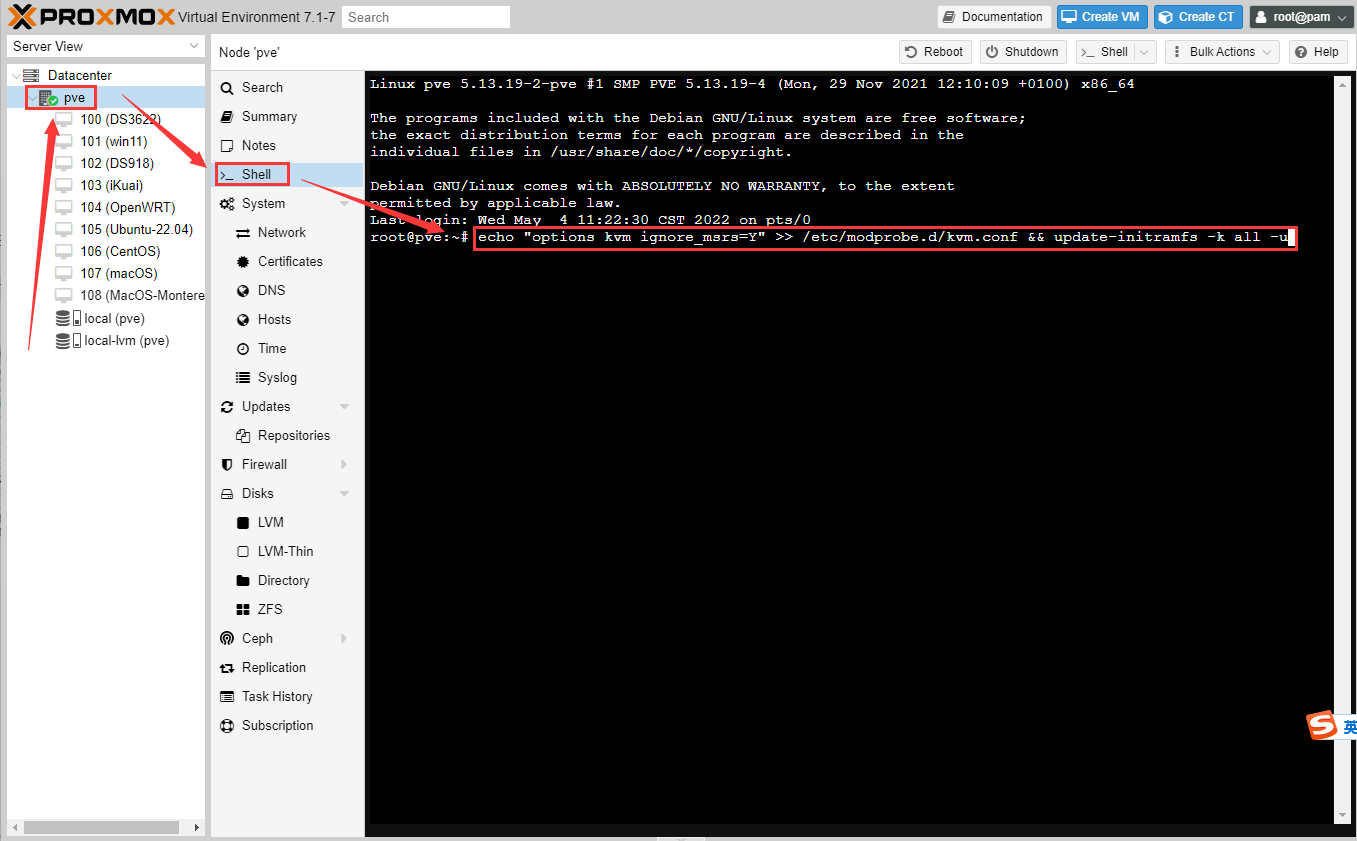
打开主节点的shell窗口,为了避免循环引导输入以下命令,并回车:
echo “options kvm ignore_msrs=Y” >> /etc/modprobe.d/kvm.conf && update-initramfs -k all -u
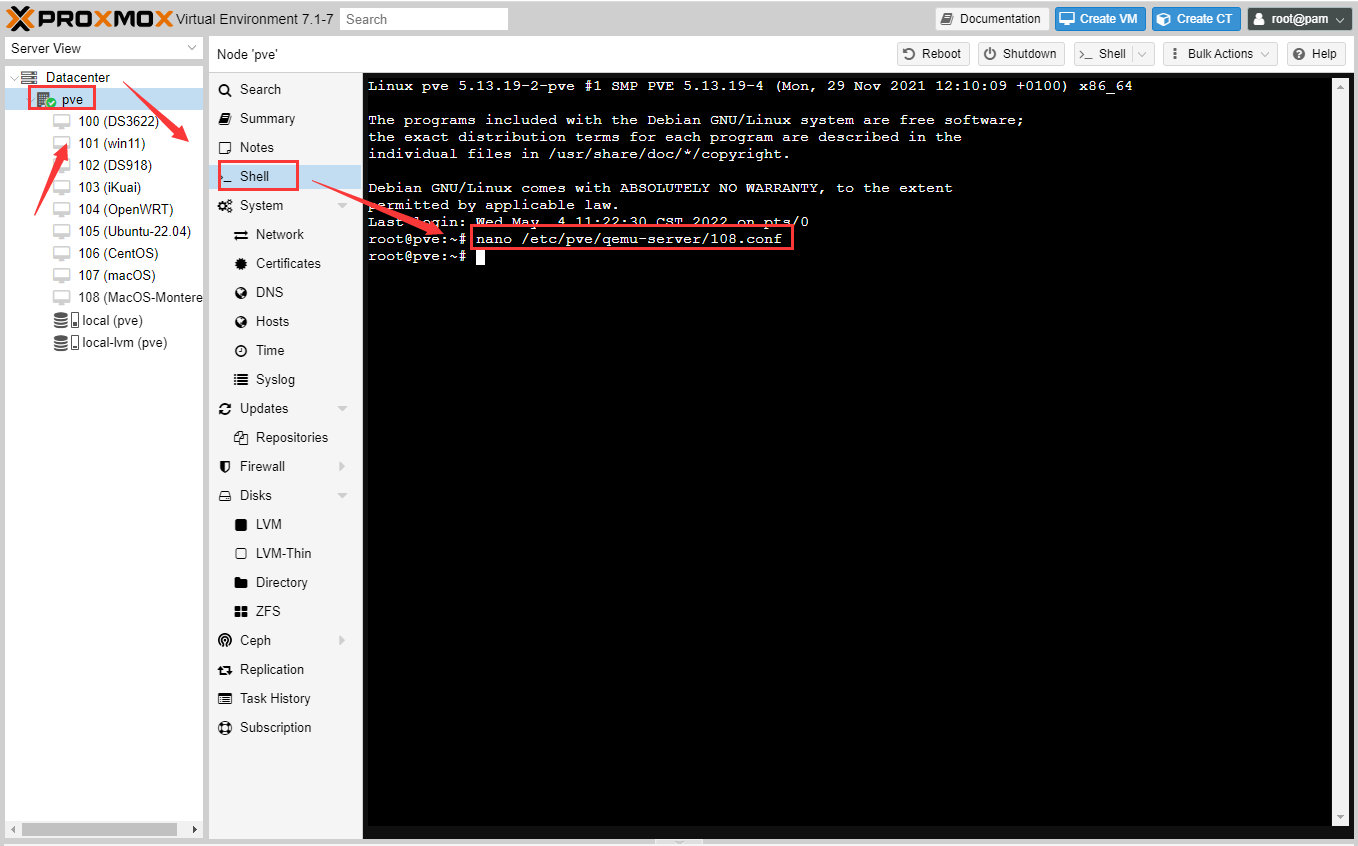
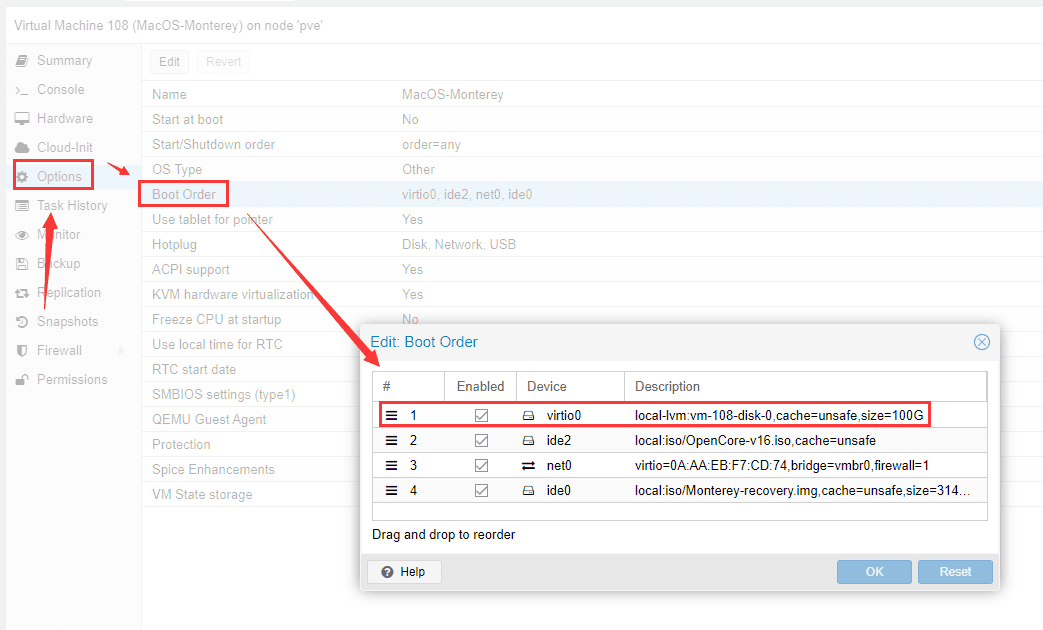
编辑启动项文件,输入以下命令,注意这里的107对应创建虚拟机的VM ID:
nano /etc/pve/qemu-server/108.conf
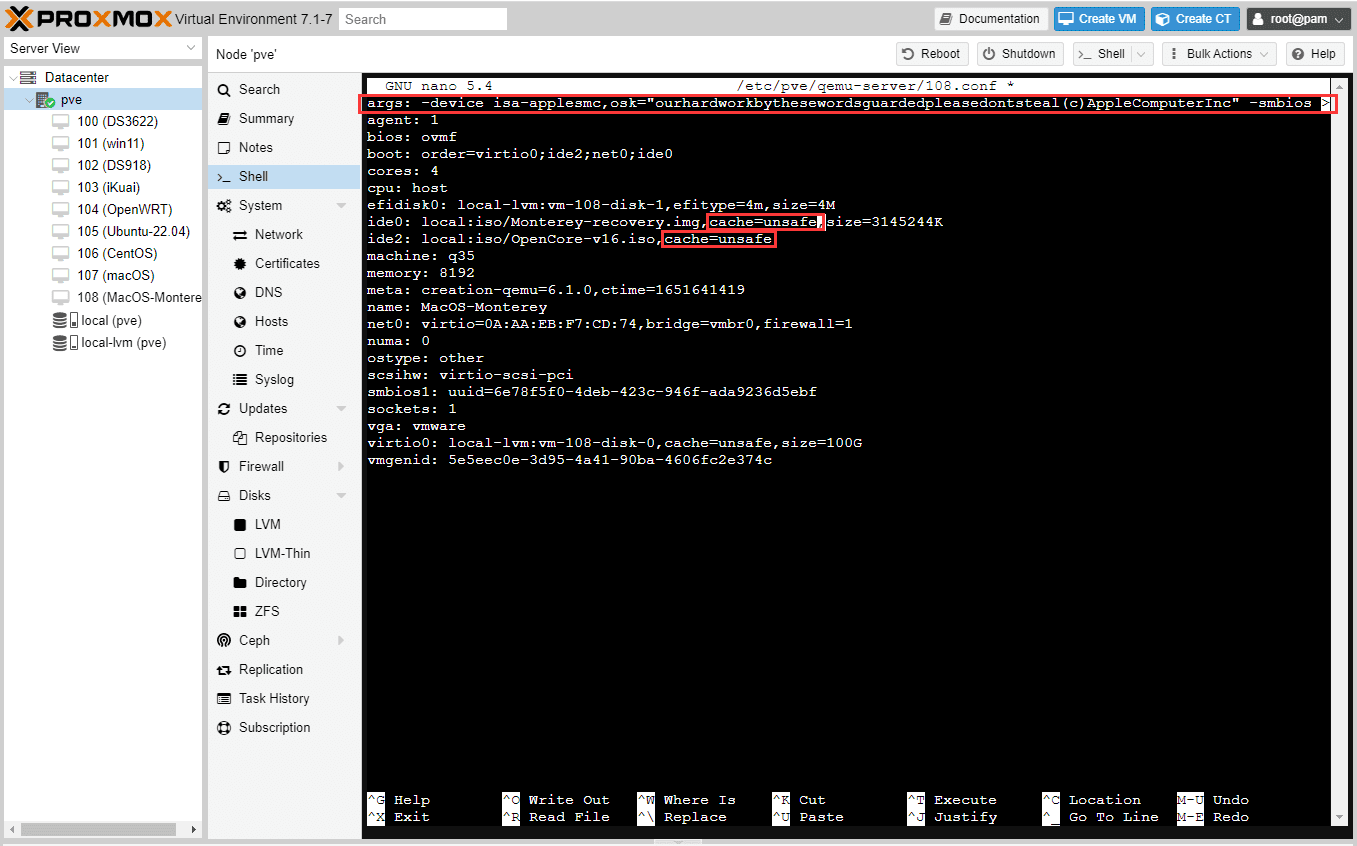
然后在文件的第一行增加一行,根据不同类型的CPU进行配置,参数如下:
Intel CPU
args: -device isa-applesmc,osk=”ourhardworkbythesewordsguardedpleasedontsteal(c)AppleComputerInc” -smbios type=2 -device usb-kbd,bus=ehci.0,port=2 -cpu host,kvm=on,vendor=GenuineIntel,+kvm_pv_unhalt,+kvm_pv_eoi,+hypervisor,+invtsc
AMD CPU
args: -device isa-applesmc,osk=”ourhardworkbythesewordsguardedpleasedontsteal(c)AppleComputerInc” -smbios type=2 -device usb-kbd,bus=ehci.0,port=2 -cpu Penryn,kvm=on,vendor=GenuineIntel,+kvm_pv_unhalt,+kvm_pv_eoi,+hypervisor,+invtsc,+pcid,+ssse3,+sse4.2,+popcnt,+avx,+avx2,+aes,+fma,+fma4,+bmi1,+bmi2,+xsave,+xsaveopt,check
然后将两处media=cdrom修改为cache=unsafe。CRRL + X然后输入Y进行保存。
四、安装Mac
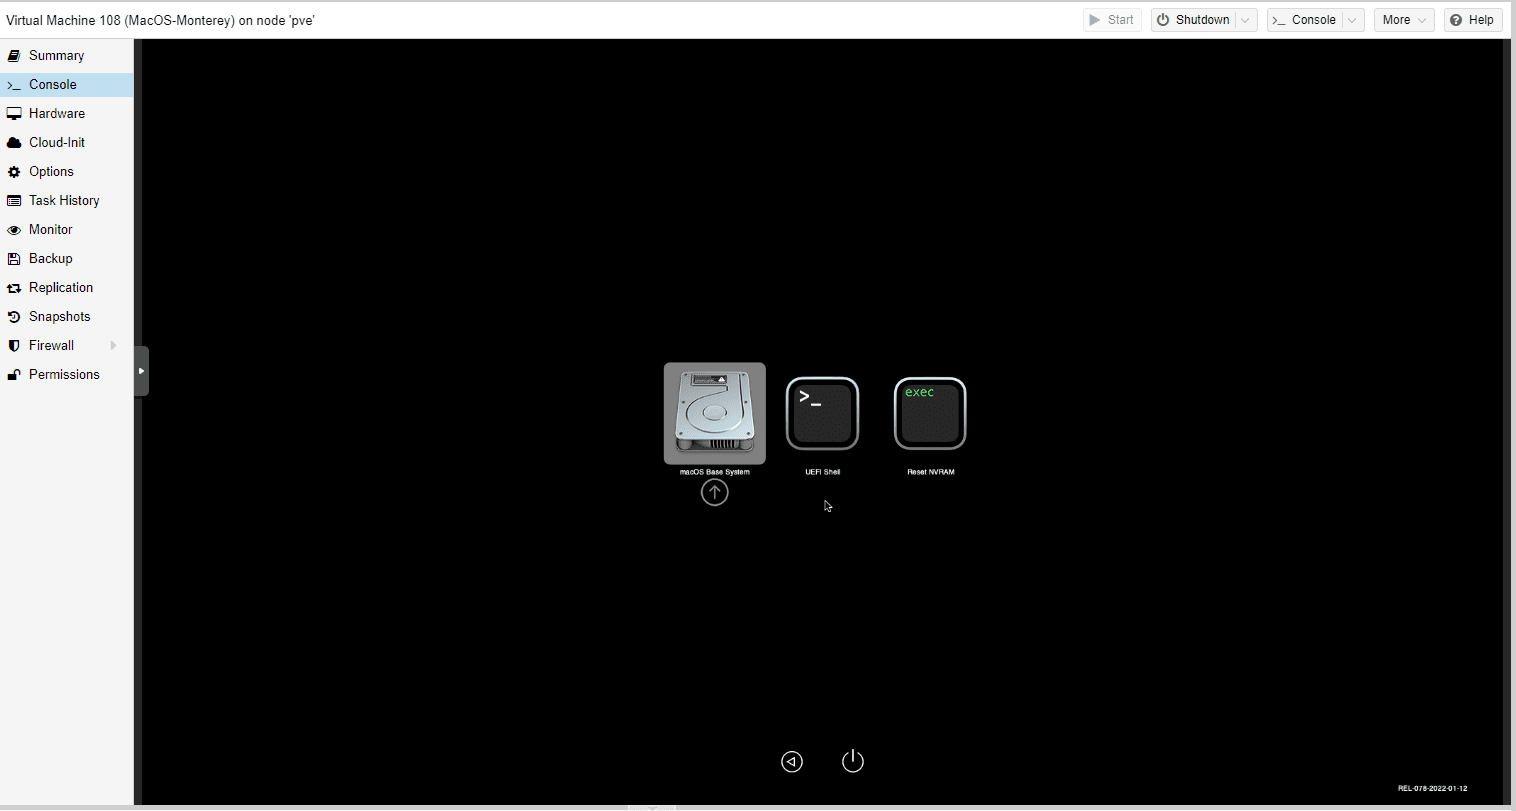
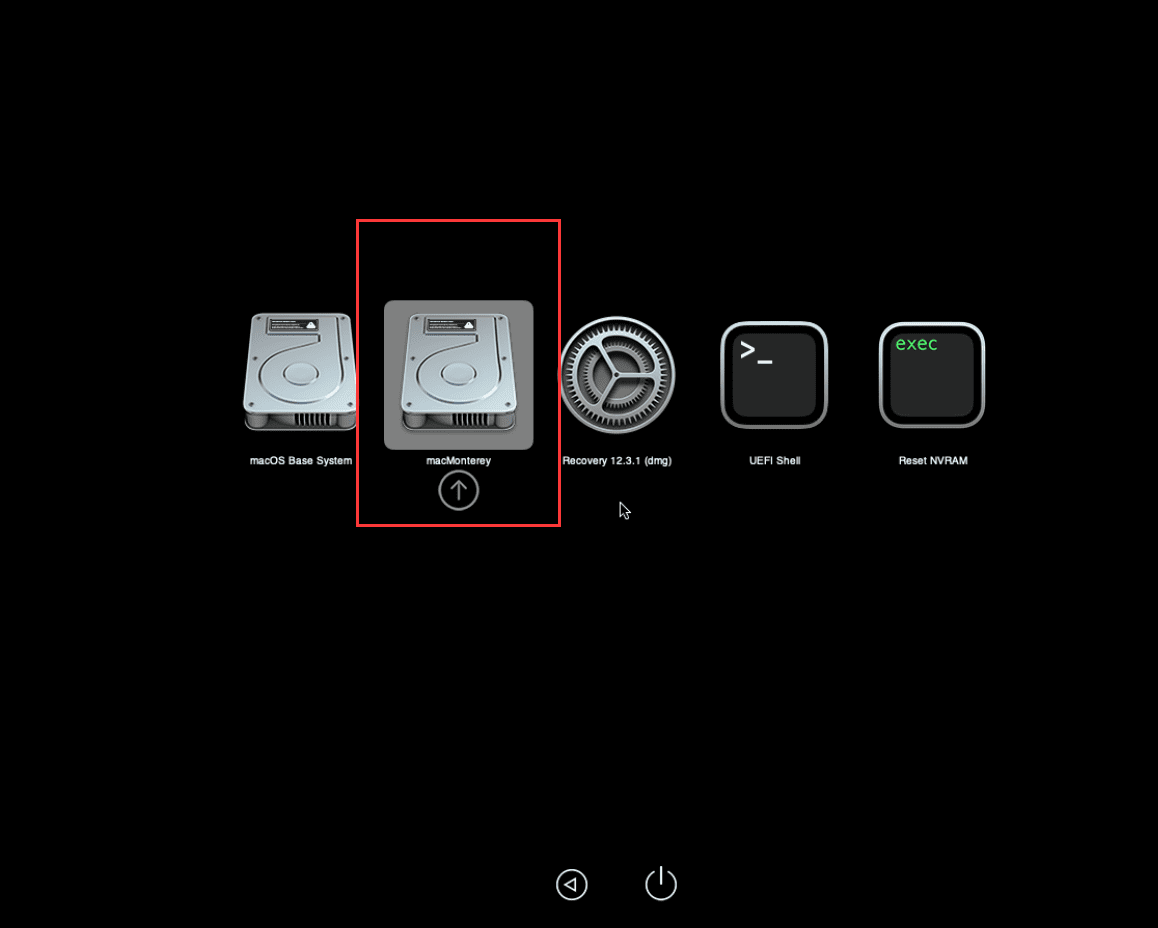
然后启动虚拟机,就可以进入这个页面,注意千万不要按ESC键。选择我们分配的100G的磁盘,回车。
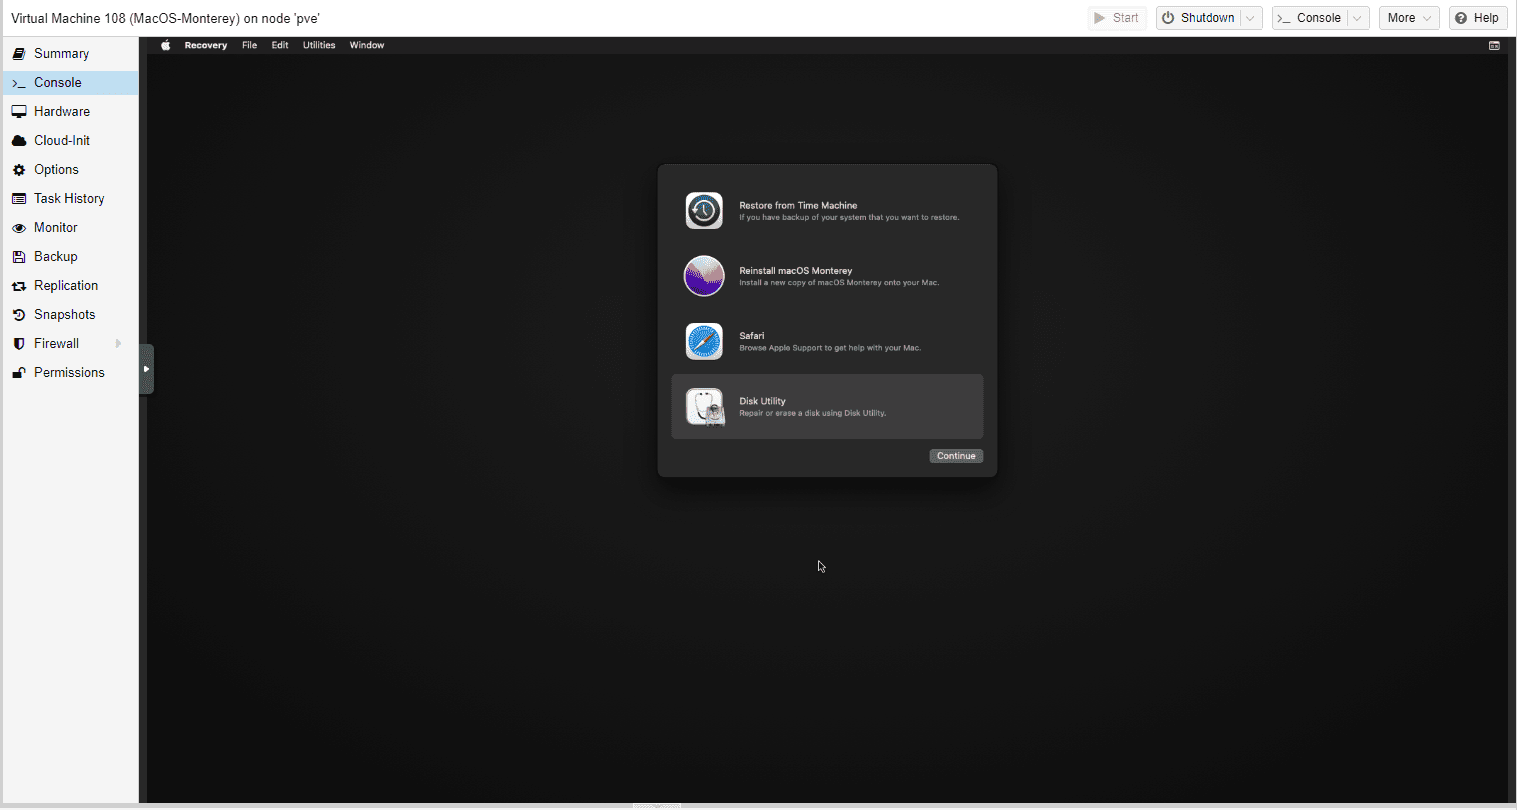
我们把磁盘格式化一下,选择Disk Utility,然后点击continue。
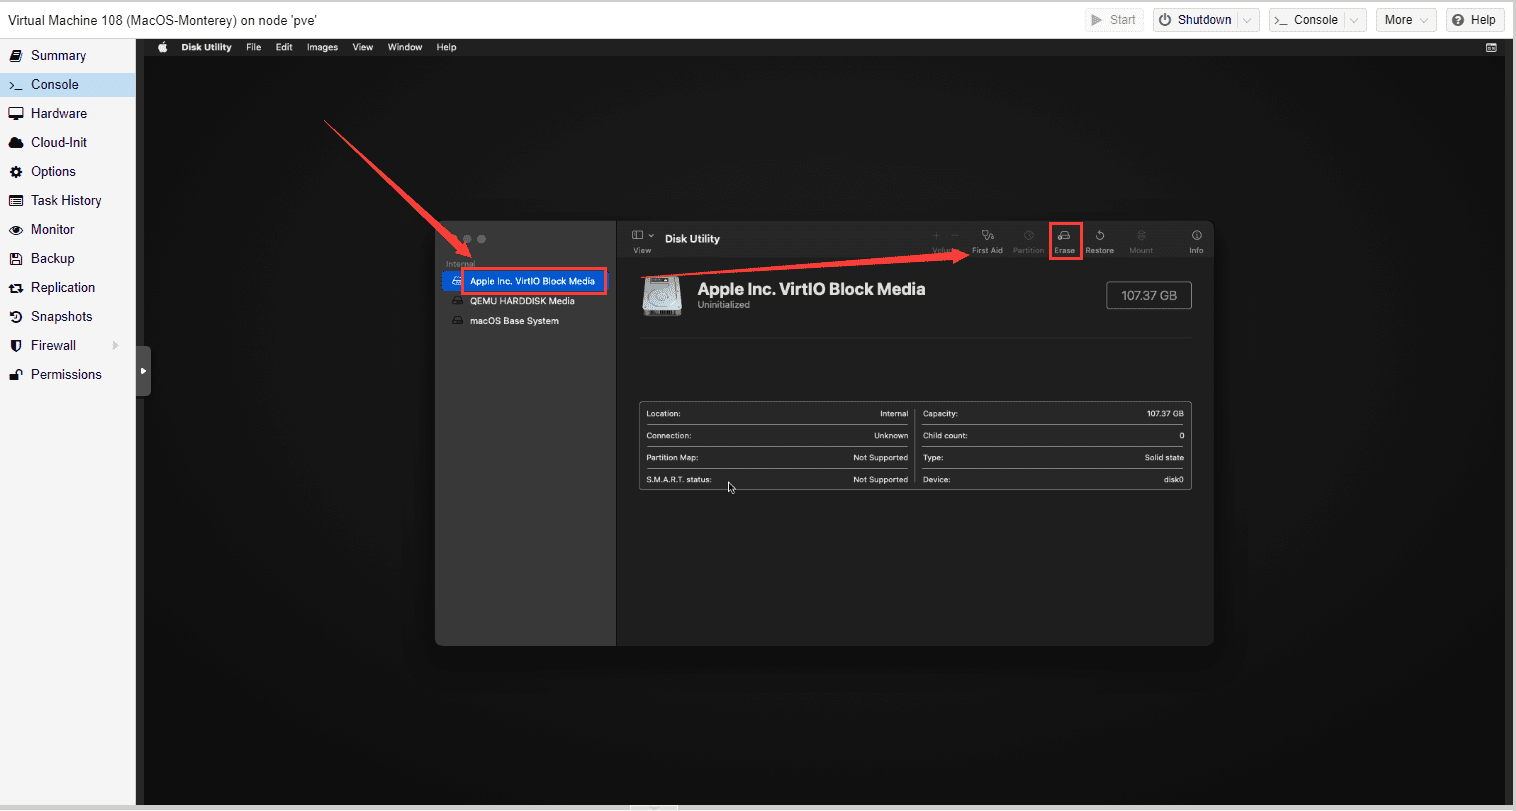
选择第一个100G的磁盘,点击erase进行擦除。
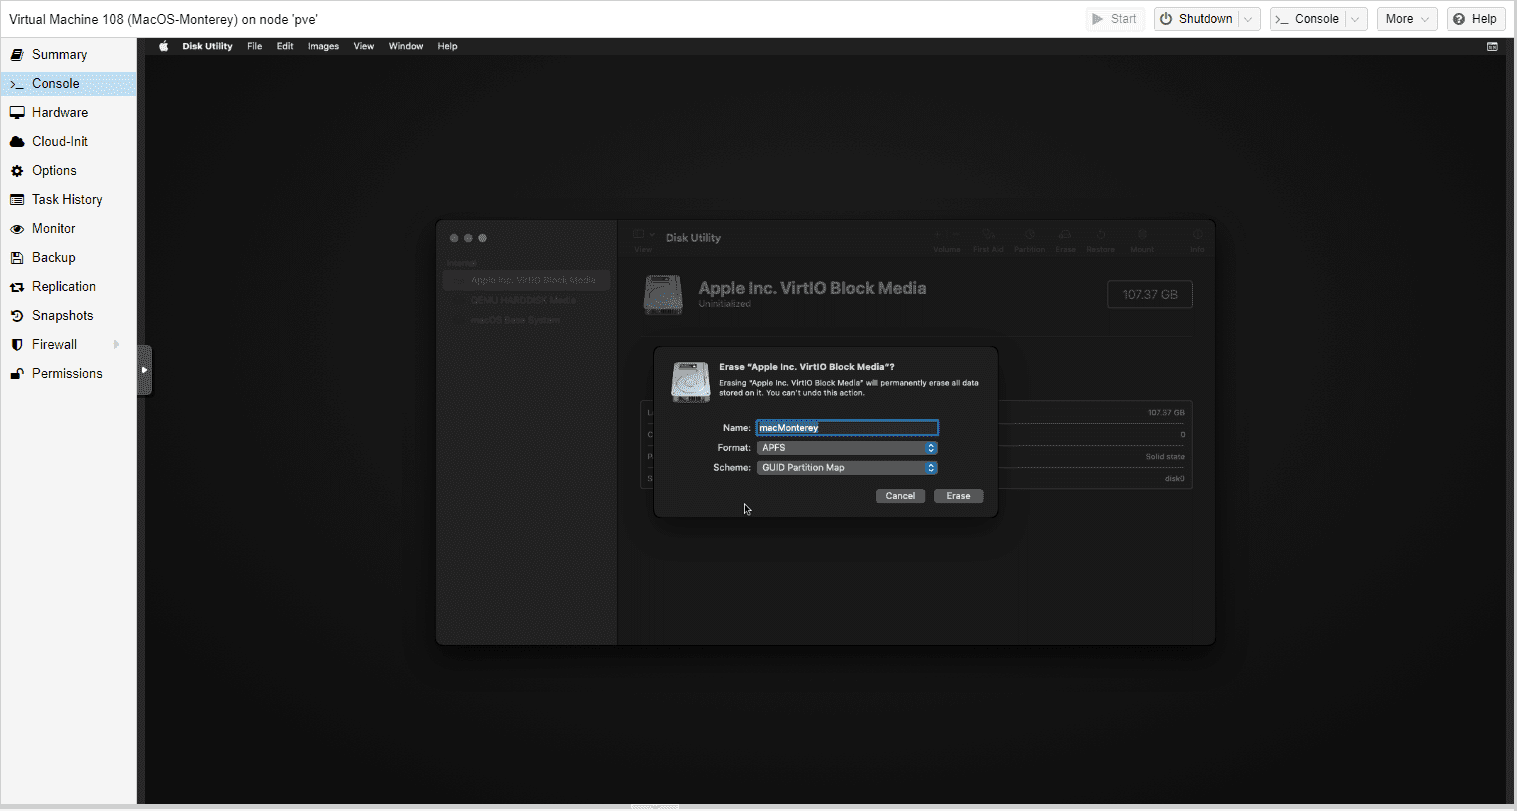
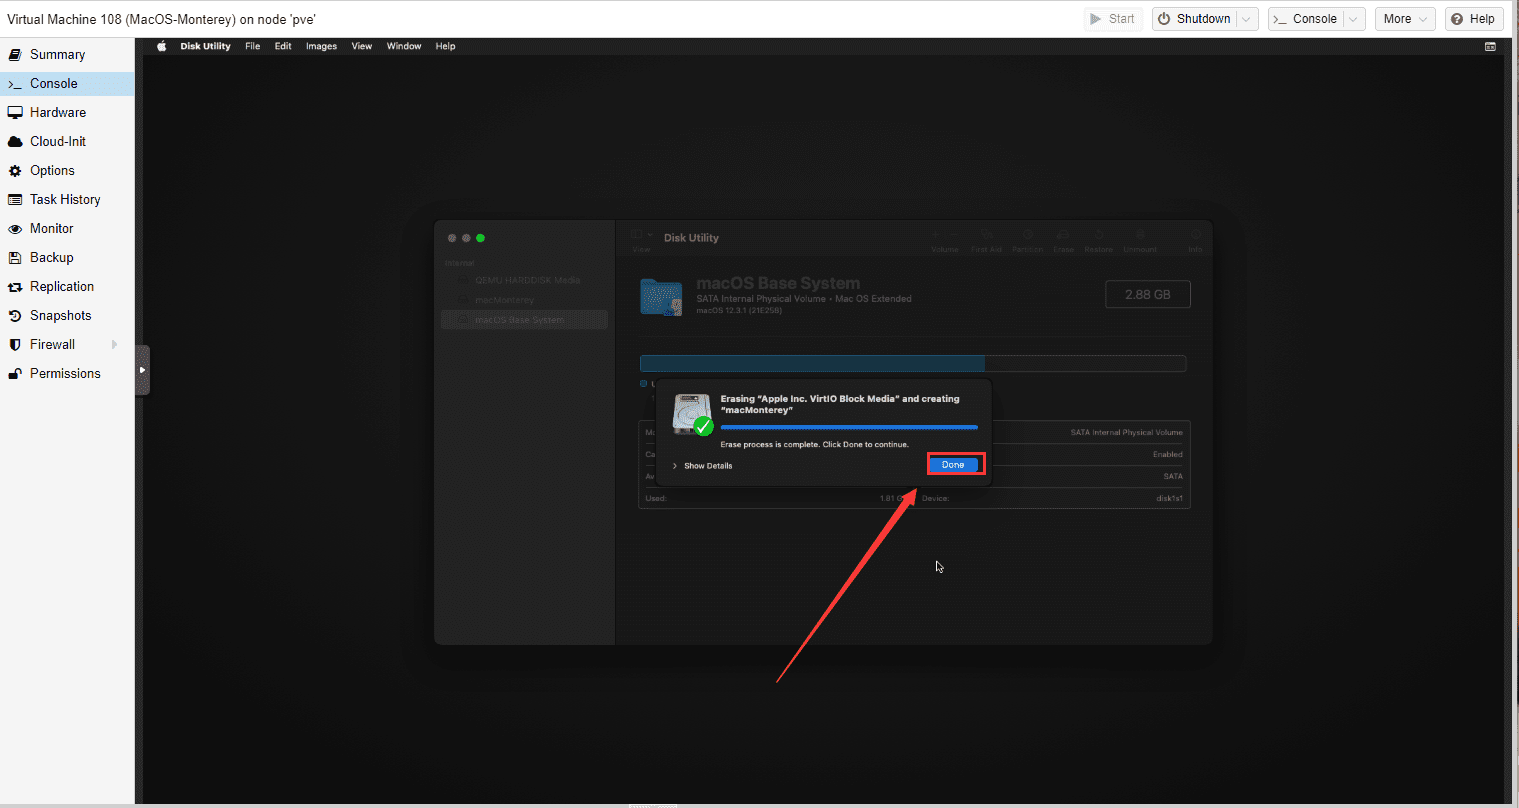
这块盘取名为macMonterey,安装完成之后这个名称会在启动的时候显示。
点击done。
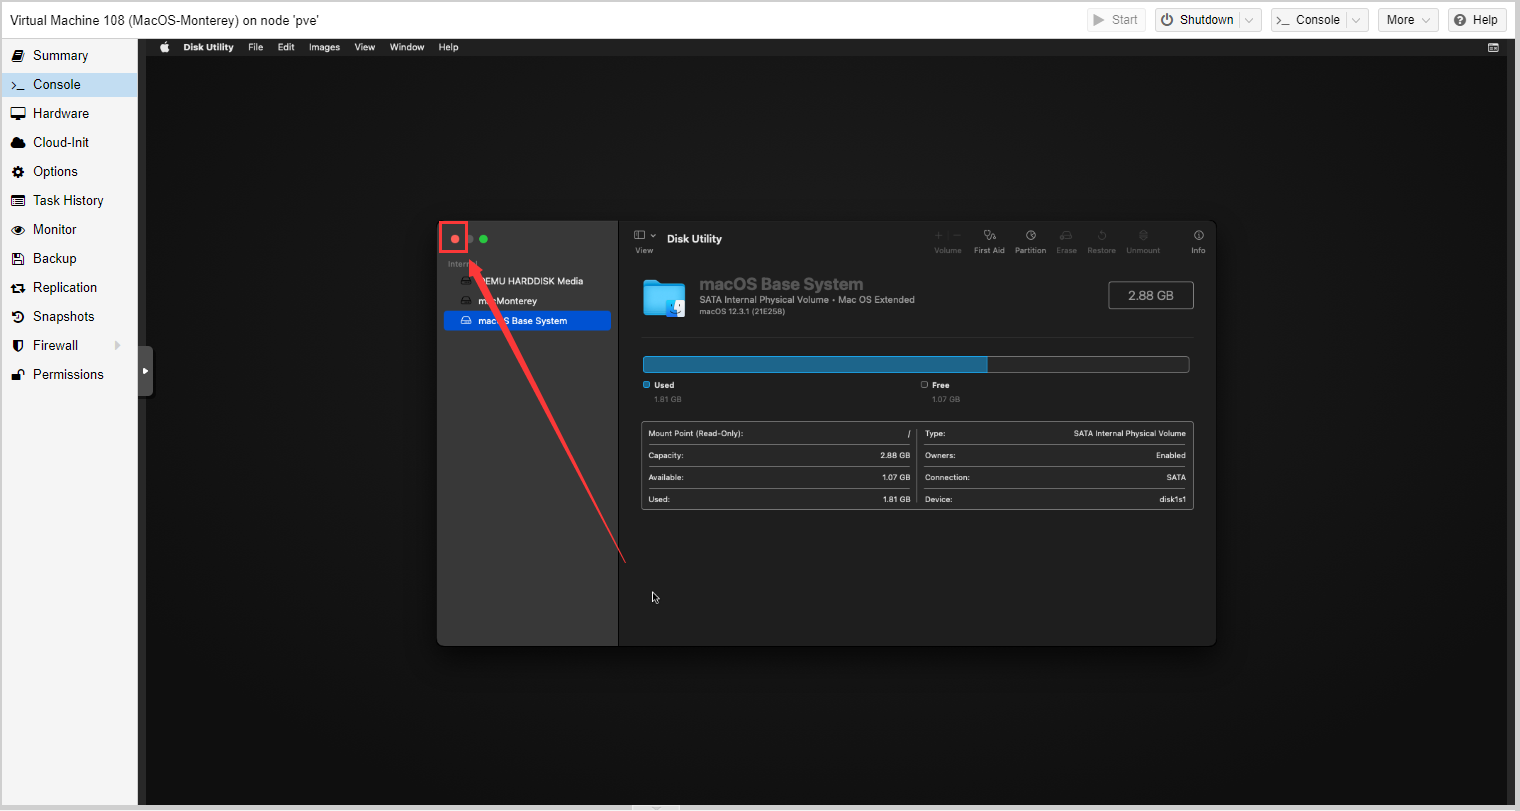
点击左上角的红点,关闭该窗口。
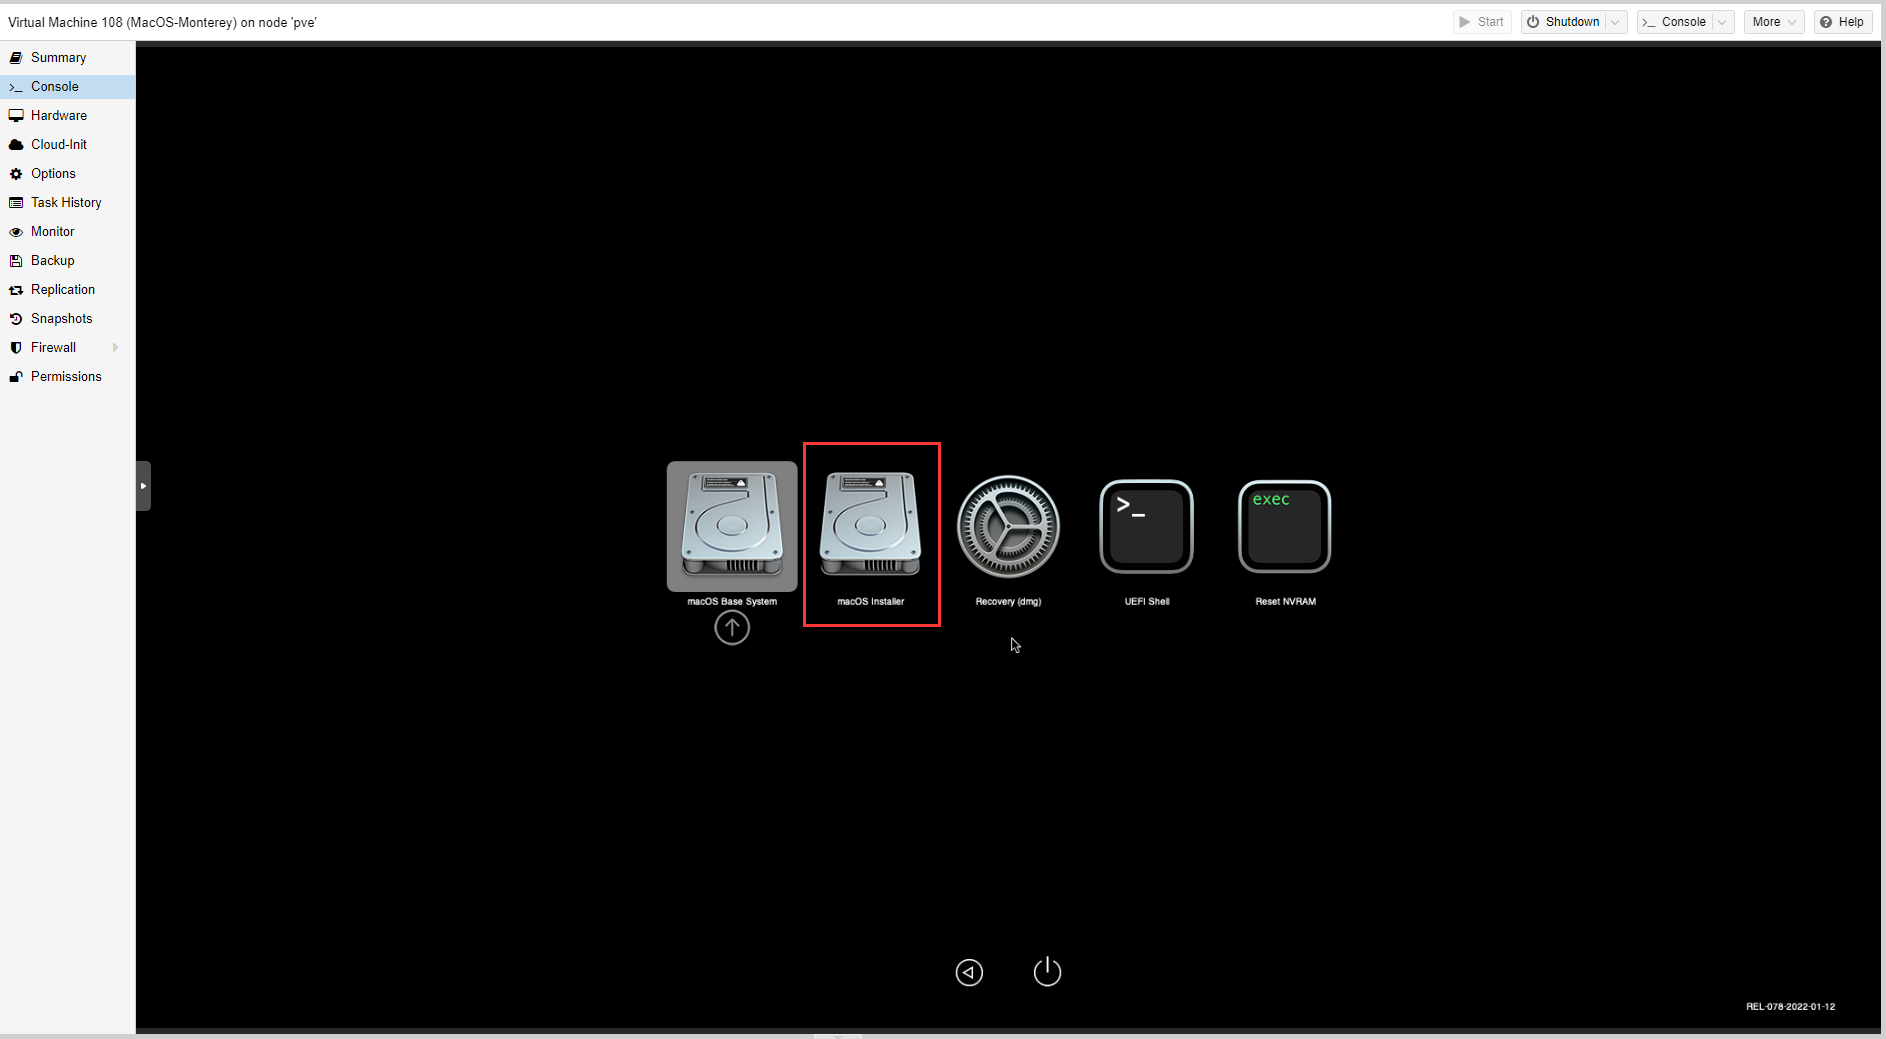
选择第二项Reinstall MacOS。
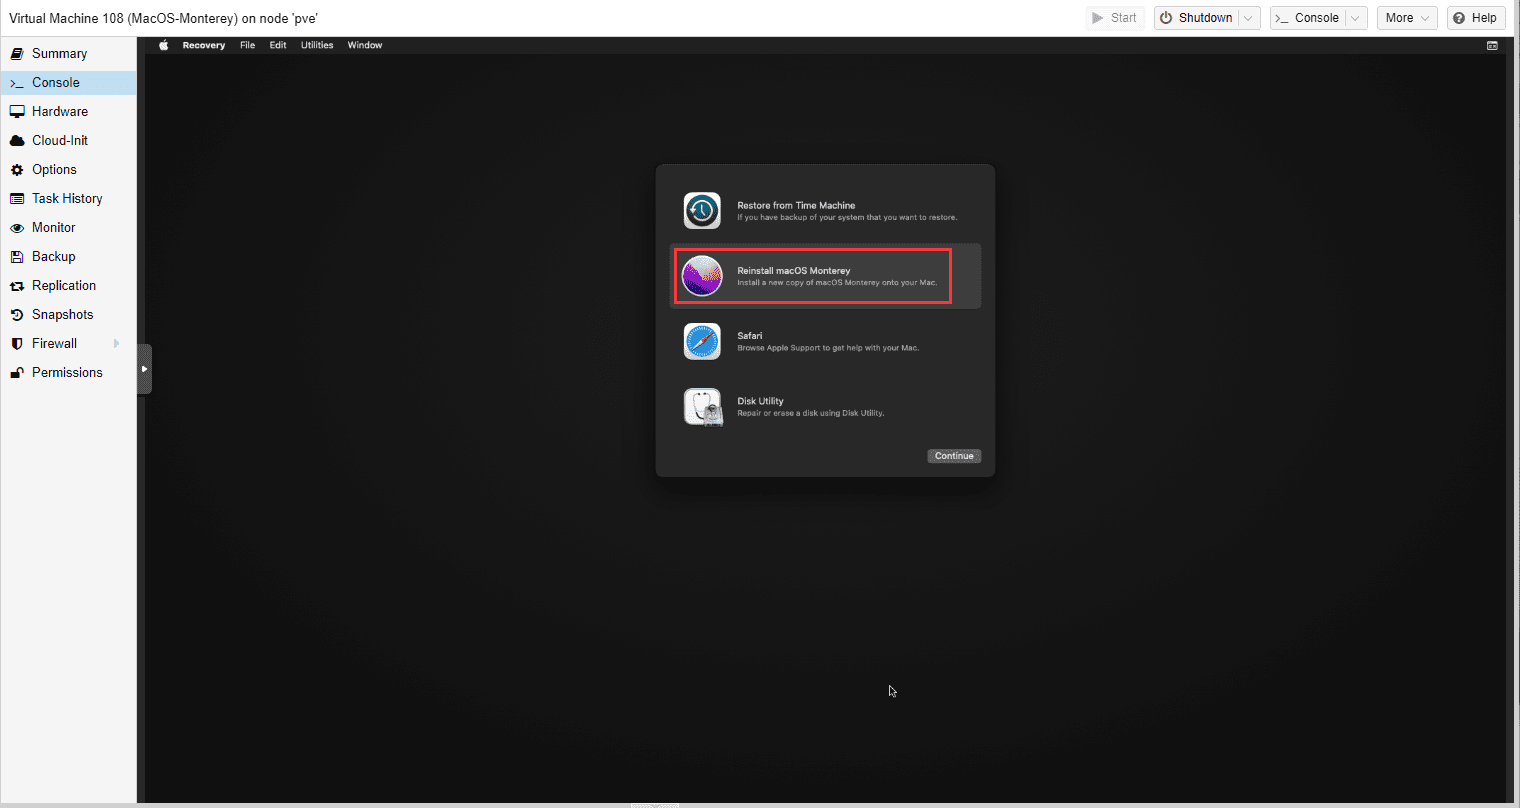
点击continue。
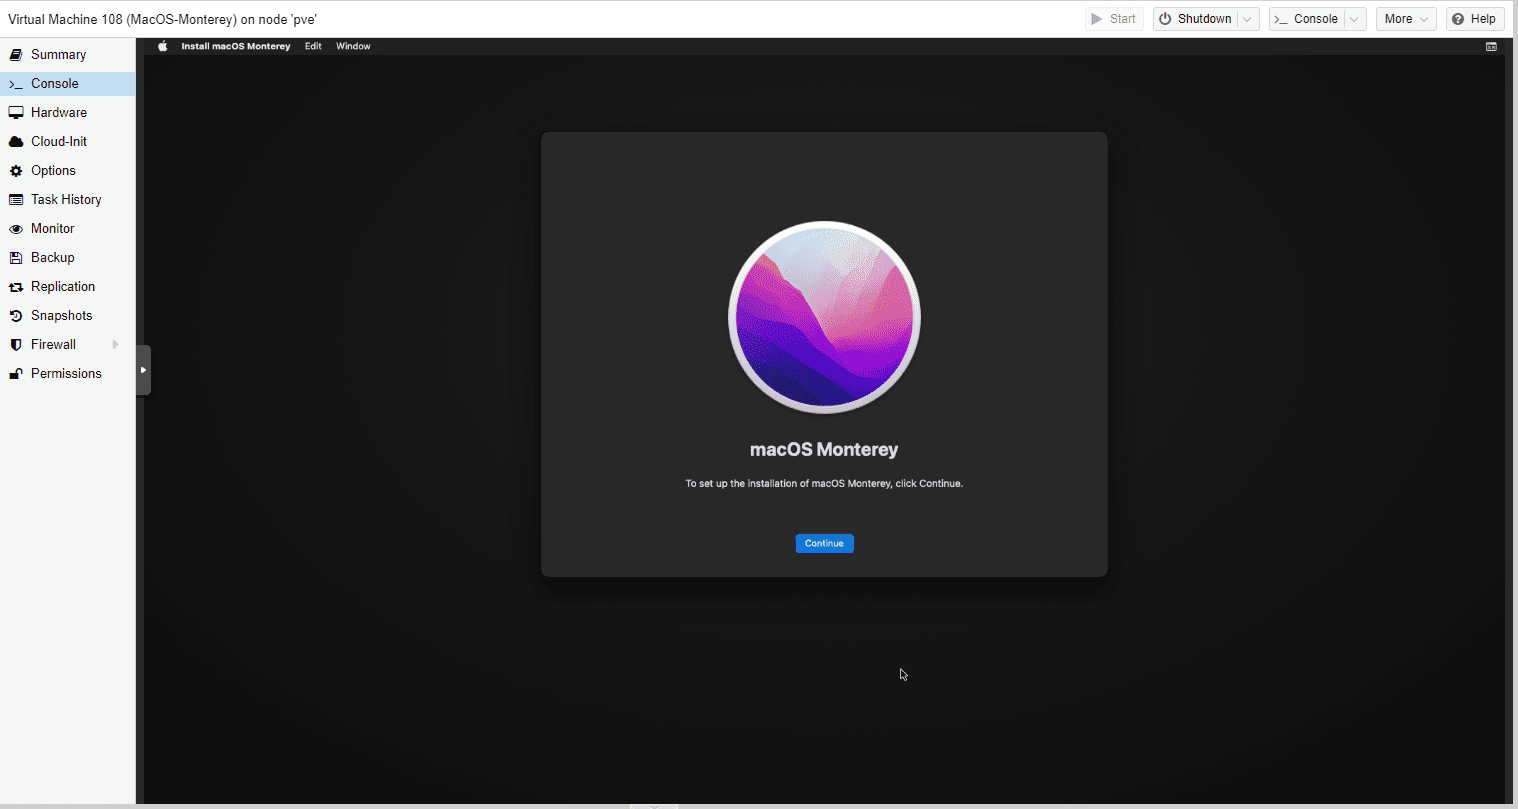
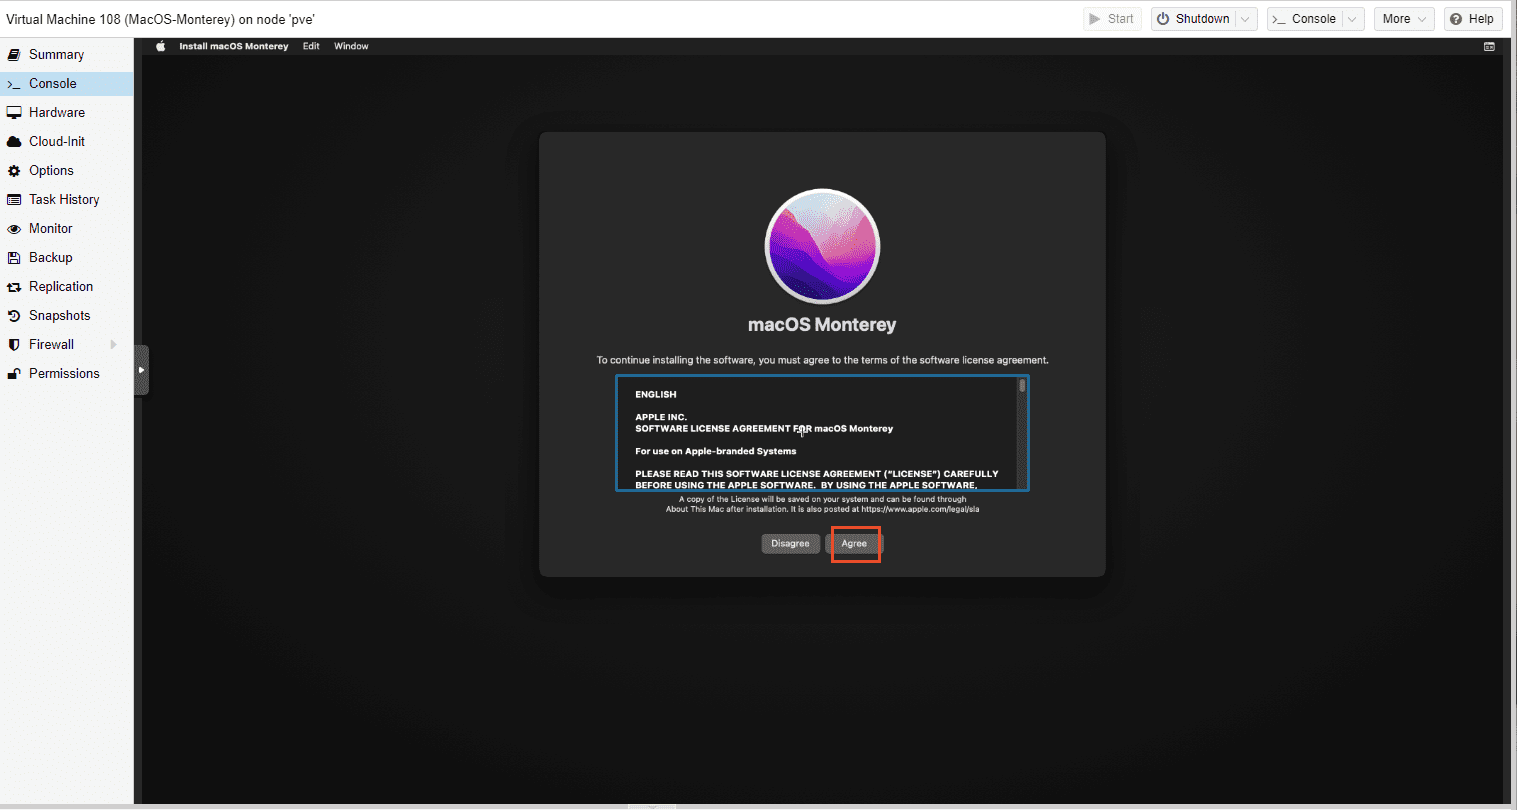
点击agree。
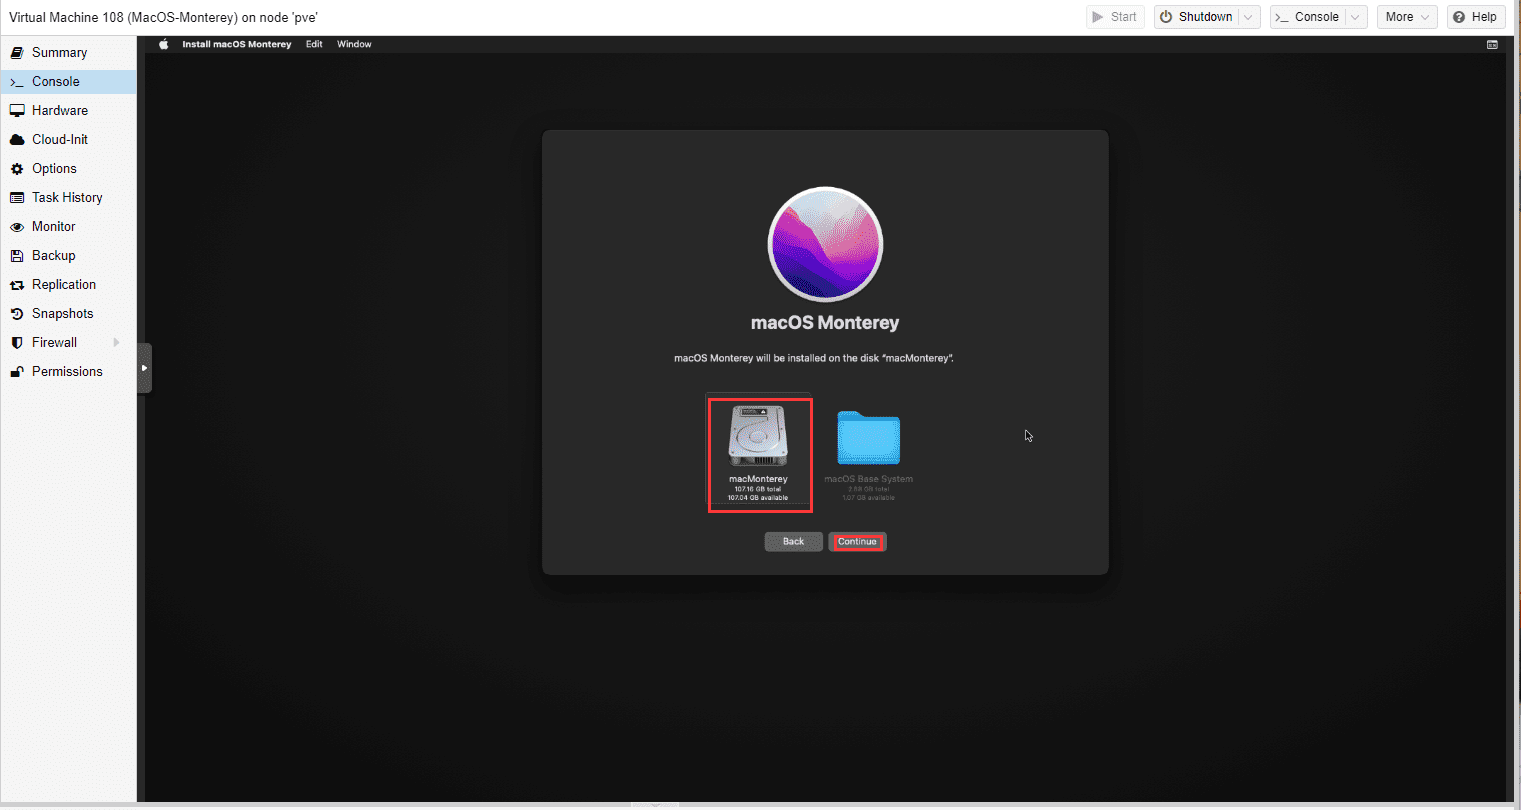
选择这款盘,然后点击install。
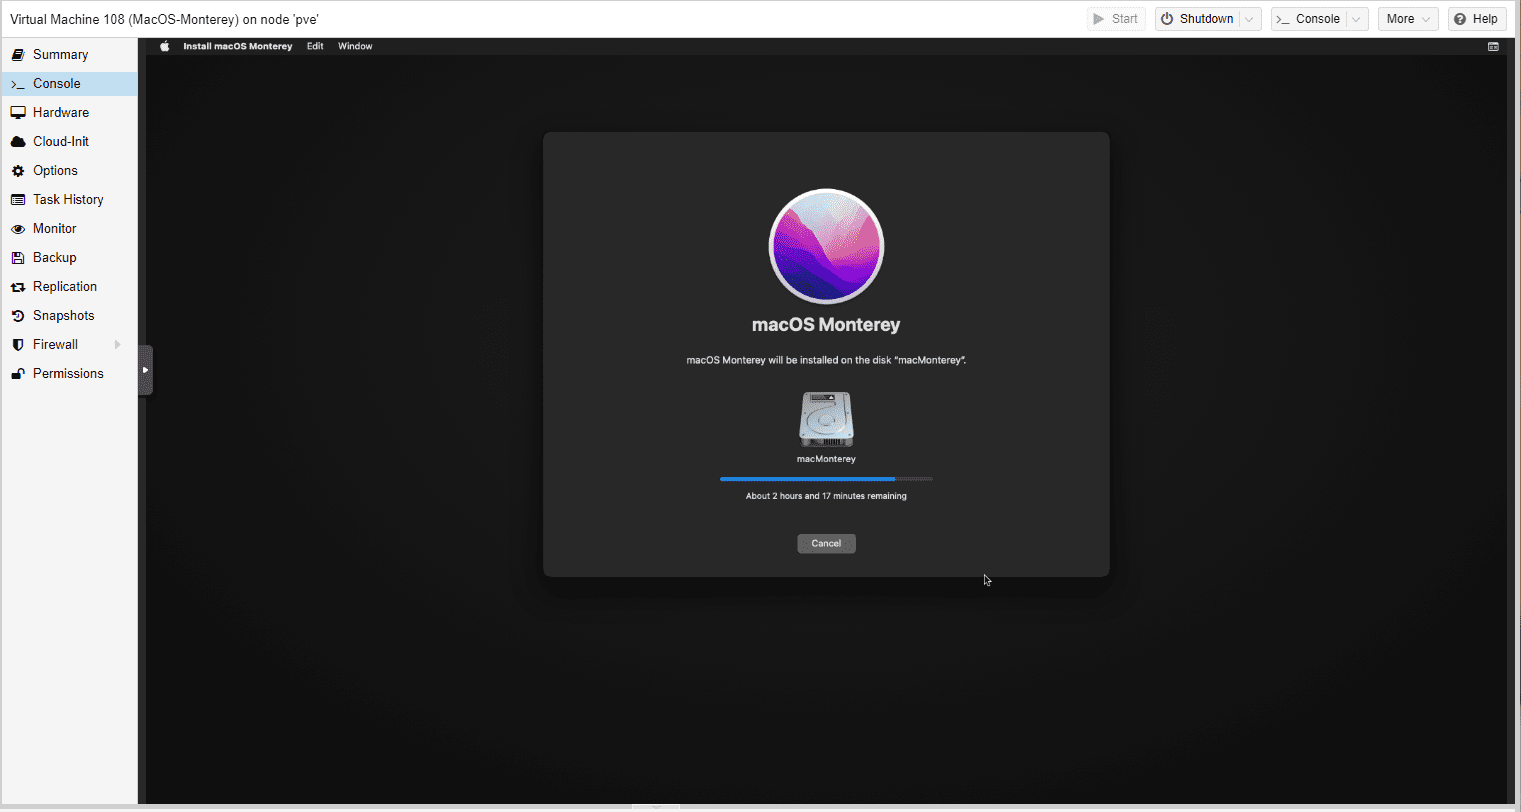
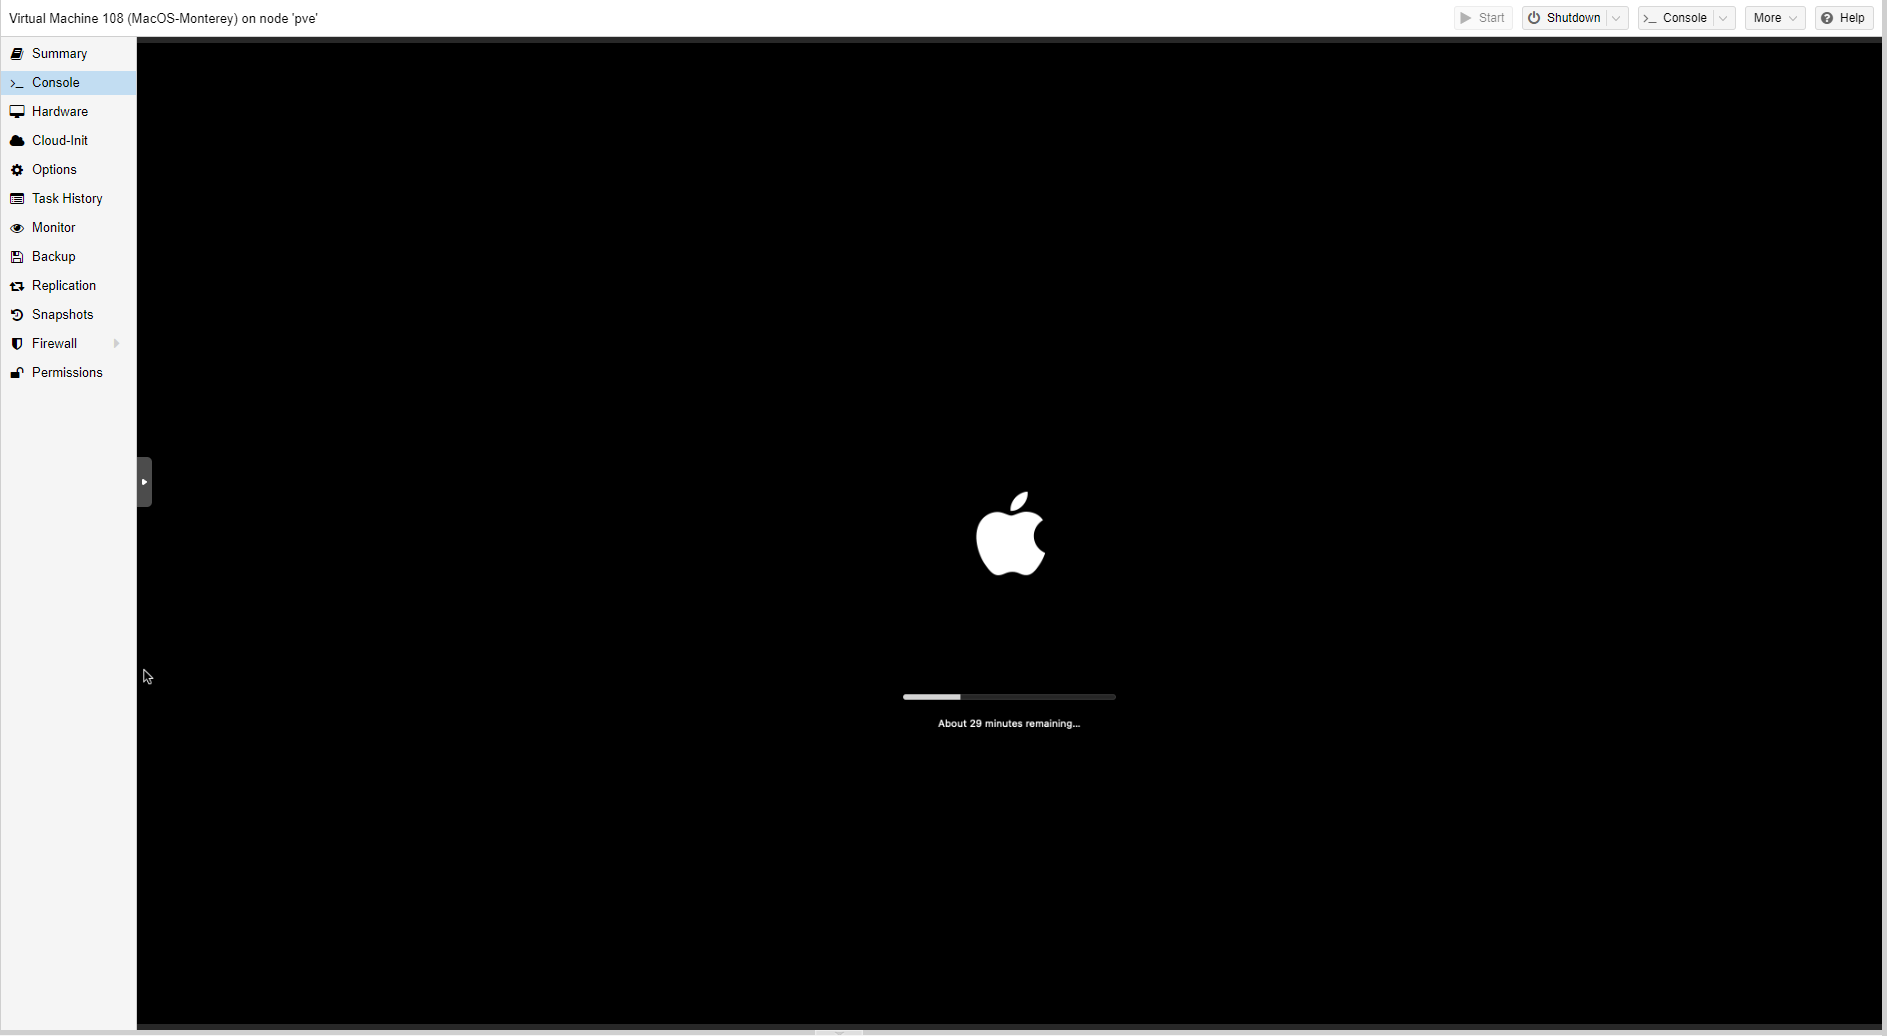
这时候macos Monterey就在安装啦,耐心等待一下。
这个时候会重启一两次,每次都选第一个盘符。直到第二块盘变成我们格式化的macMonterey盘符。
五、初始化Mac系统
进入Mac系统选择第二个盘符,我们格式化之后的这个macMonterey盘。

为了方便起见,安装好了之后,可以进行启动项设置,把100G这款盘调整到首选项启动。
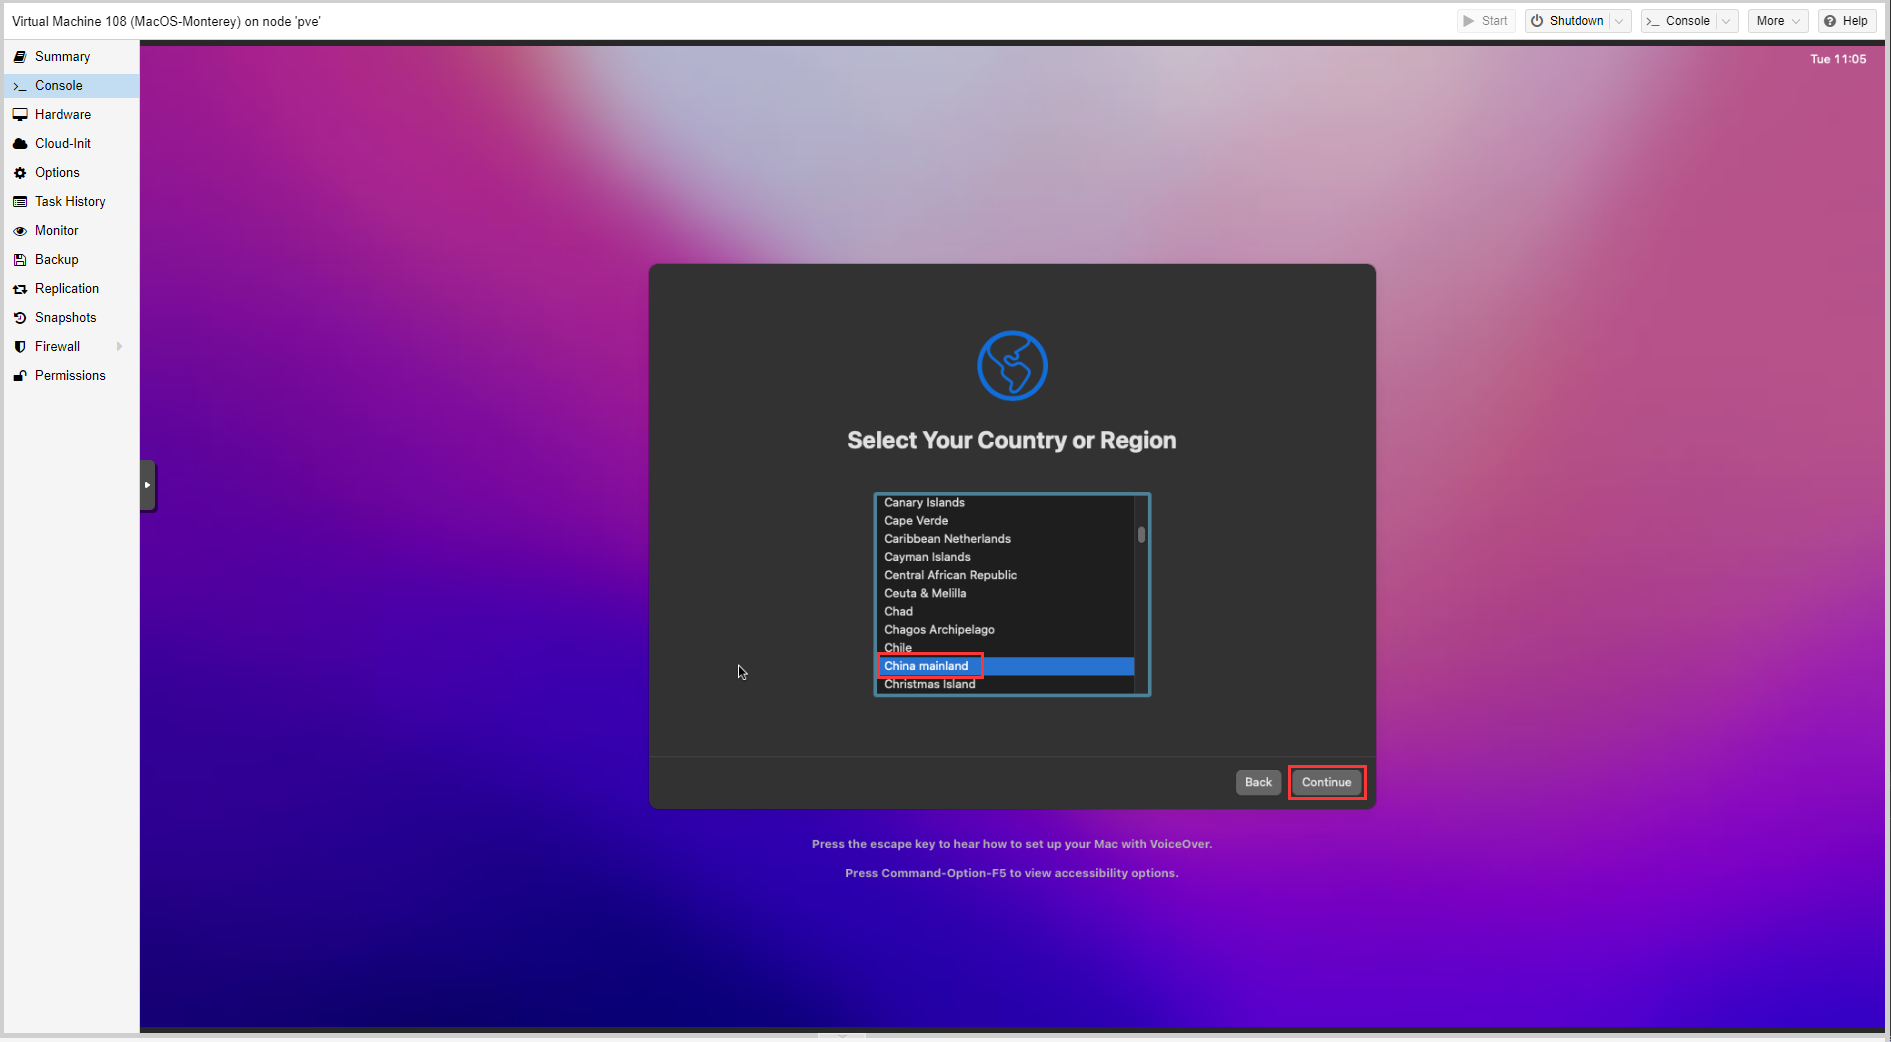
选择国家为中国大陆,并点击继续。
点击继续。

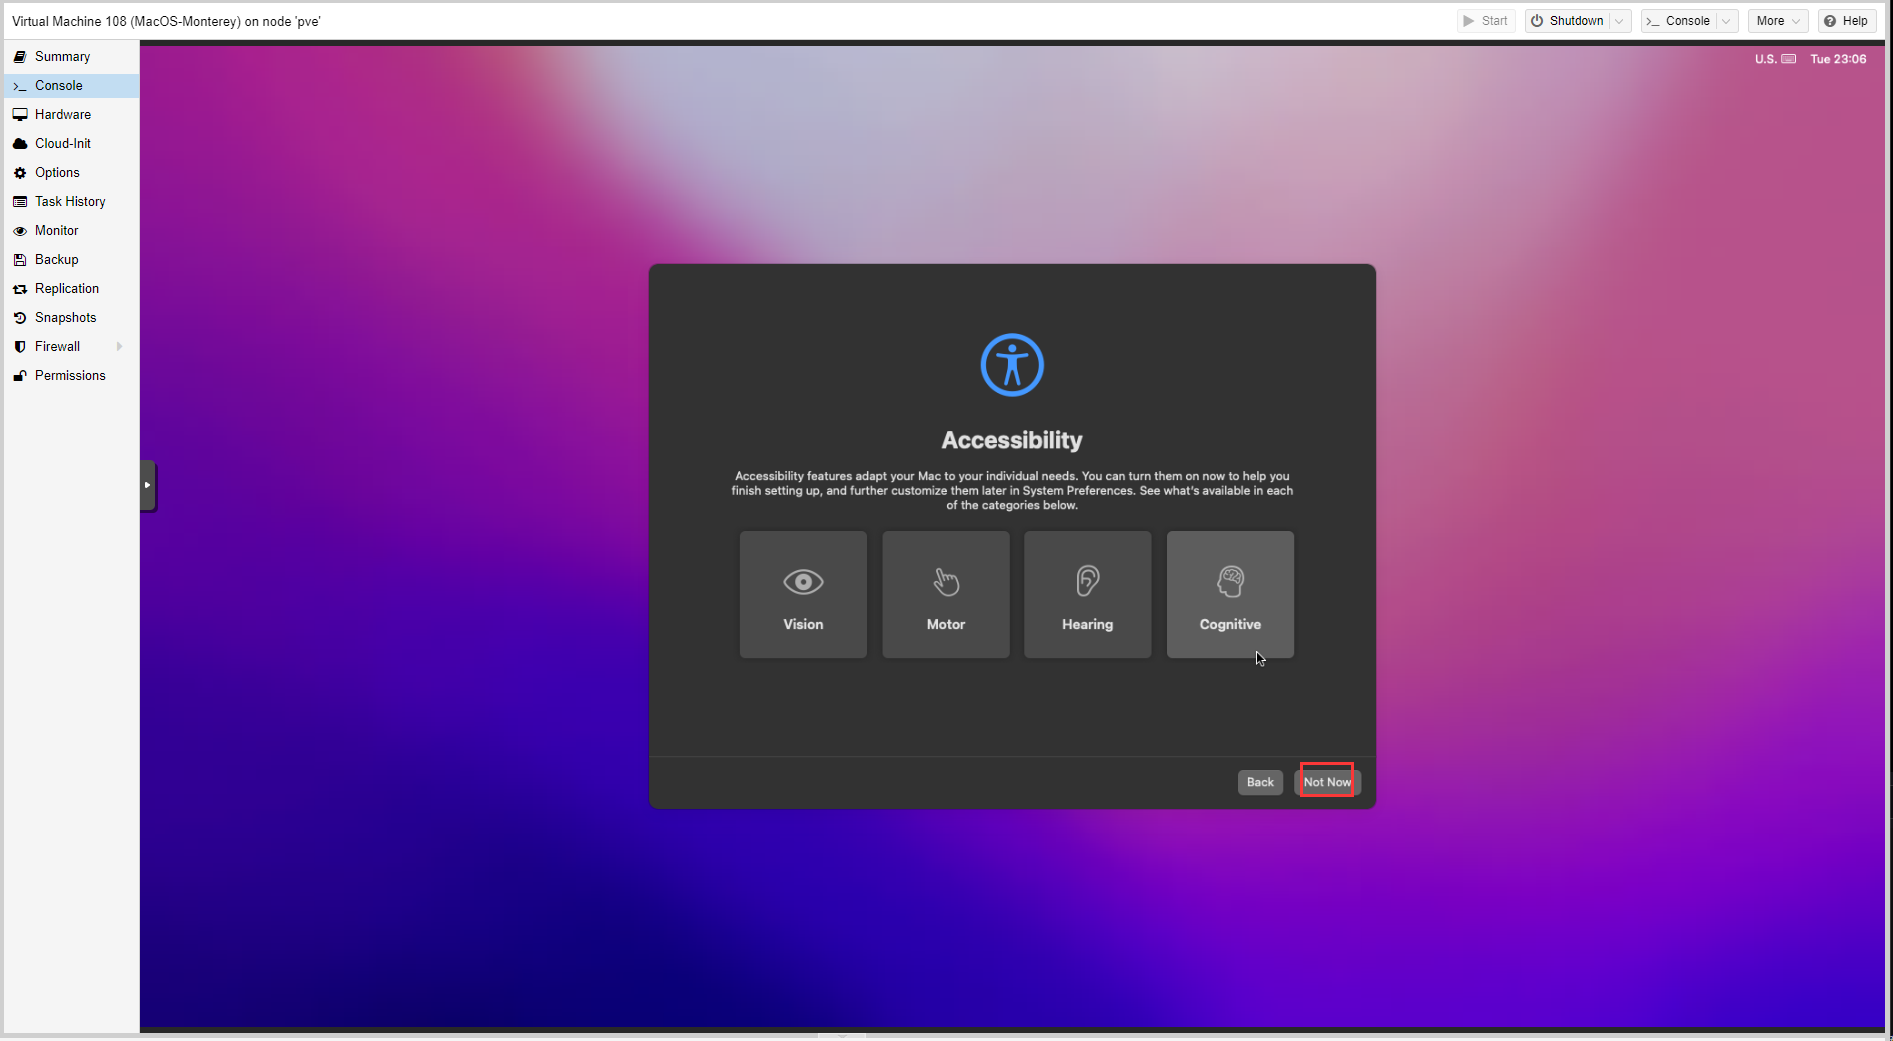
点击not now。
点击继续。

点就Not Now

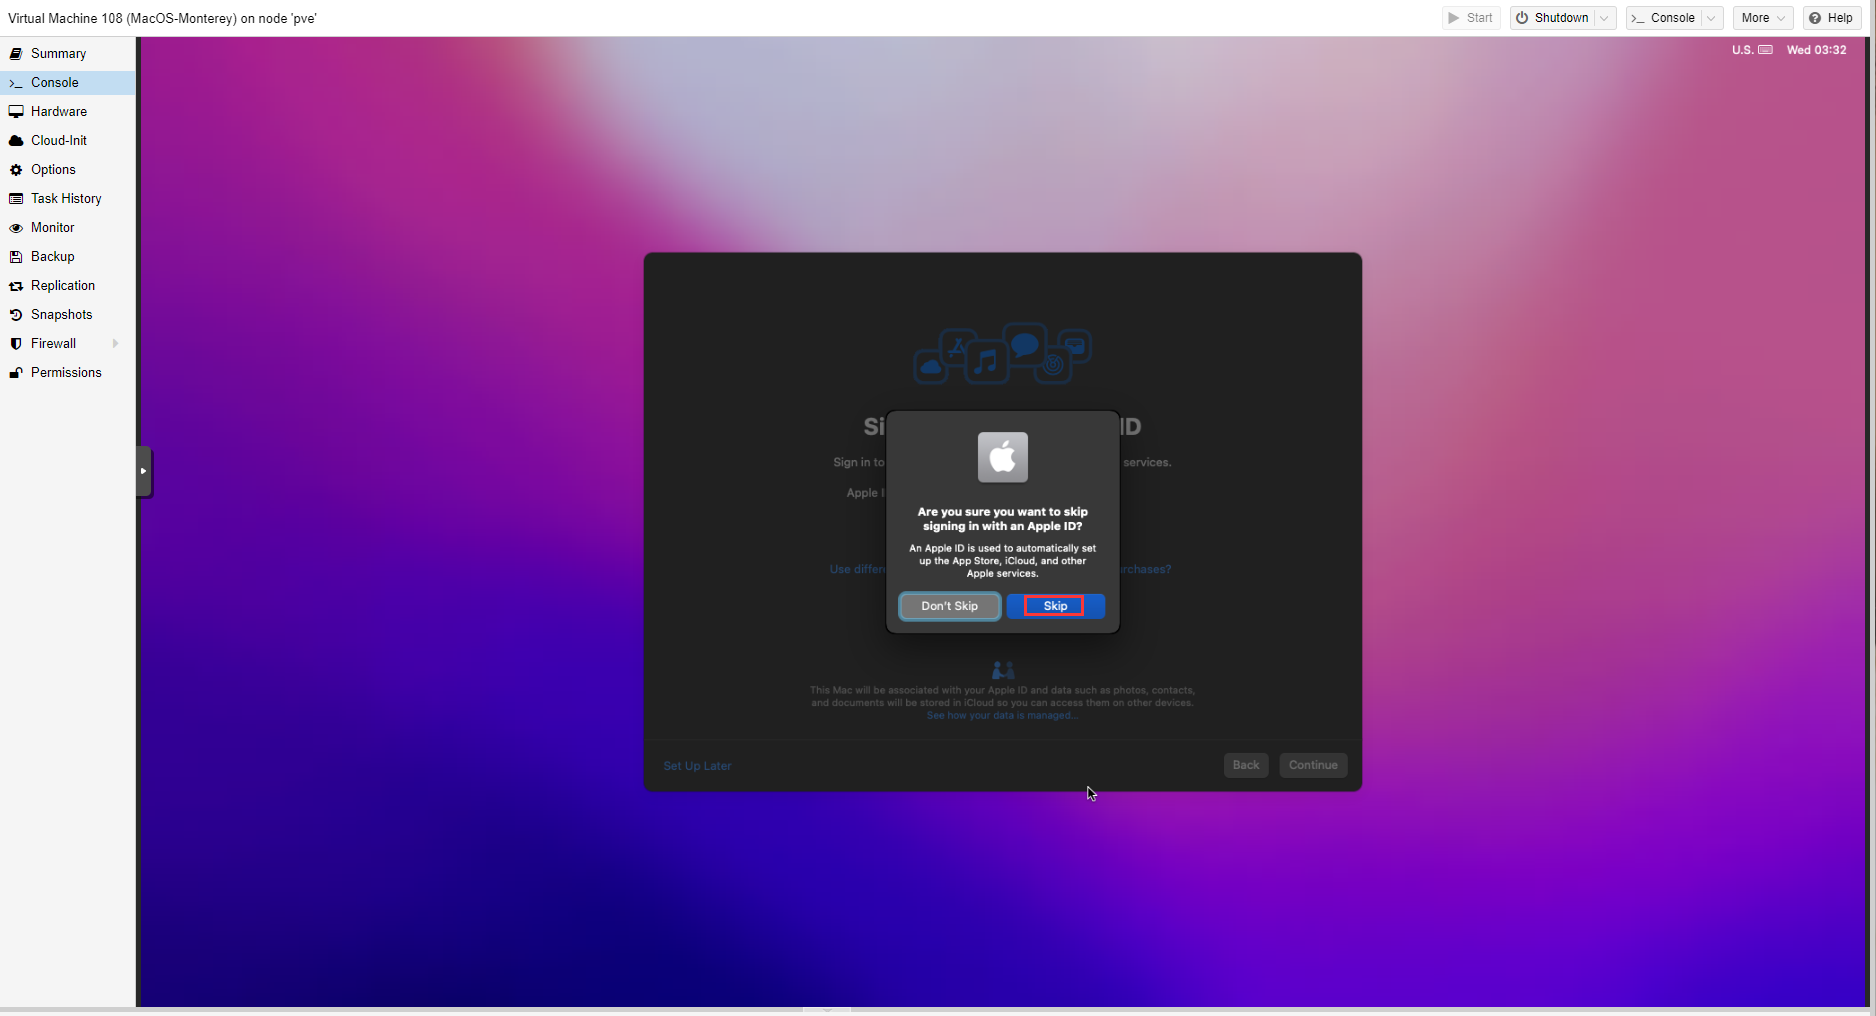
登陆自己的apple id,如果没有可以在线申请账号。我这里就不设置账号登录了,直接点击Set Up Later。

点击Skip。
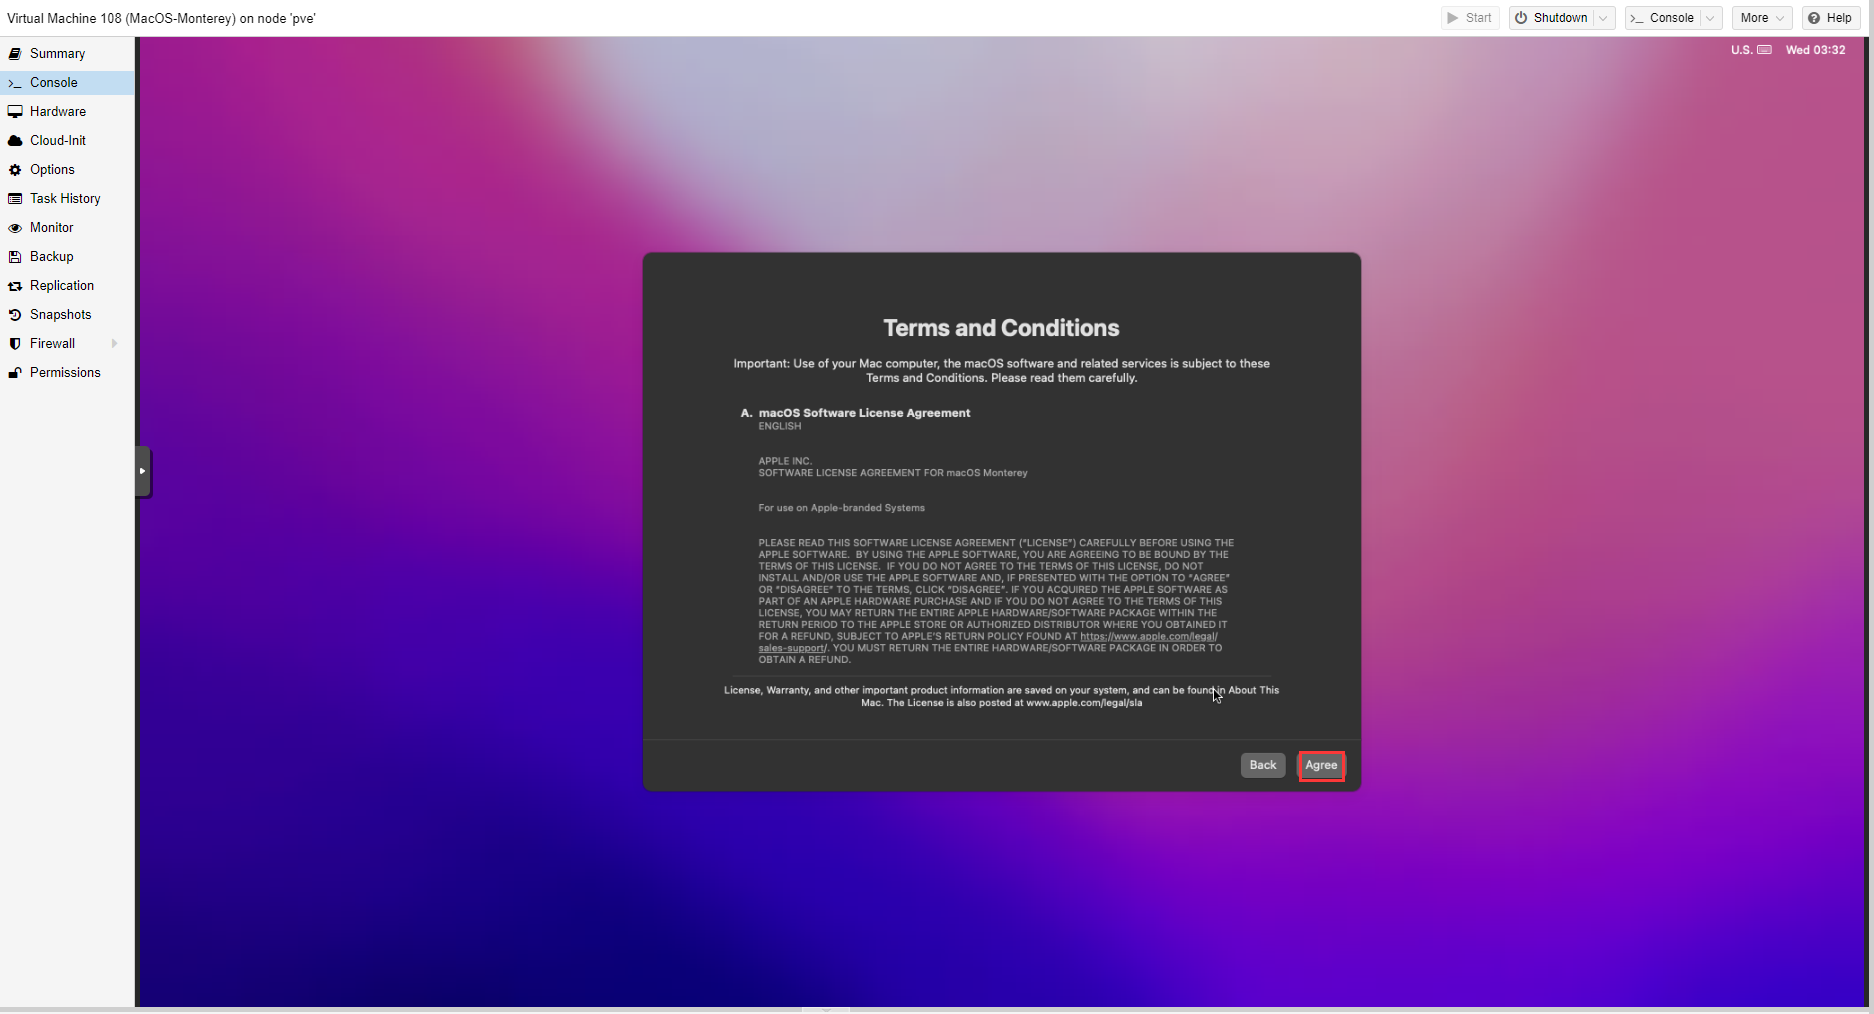
点击Agree。
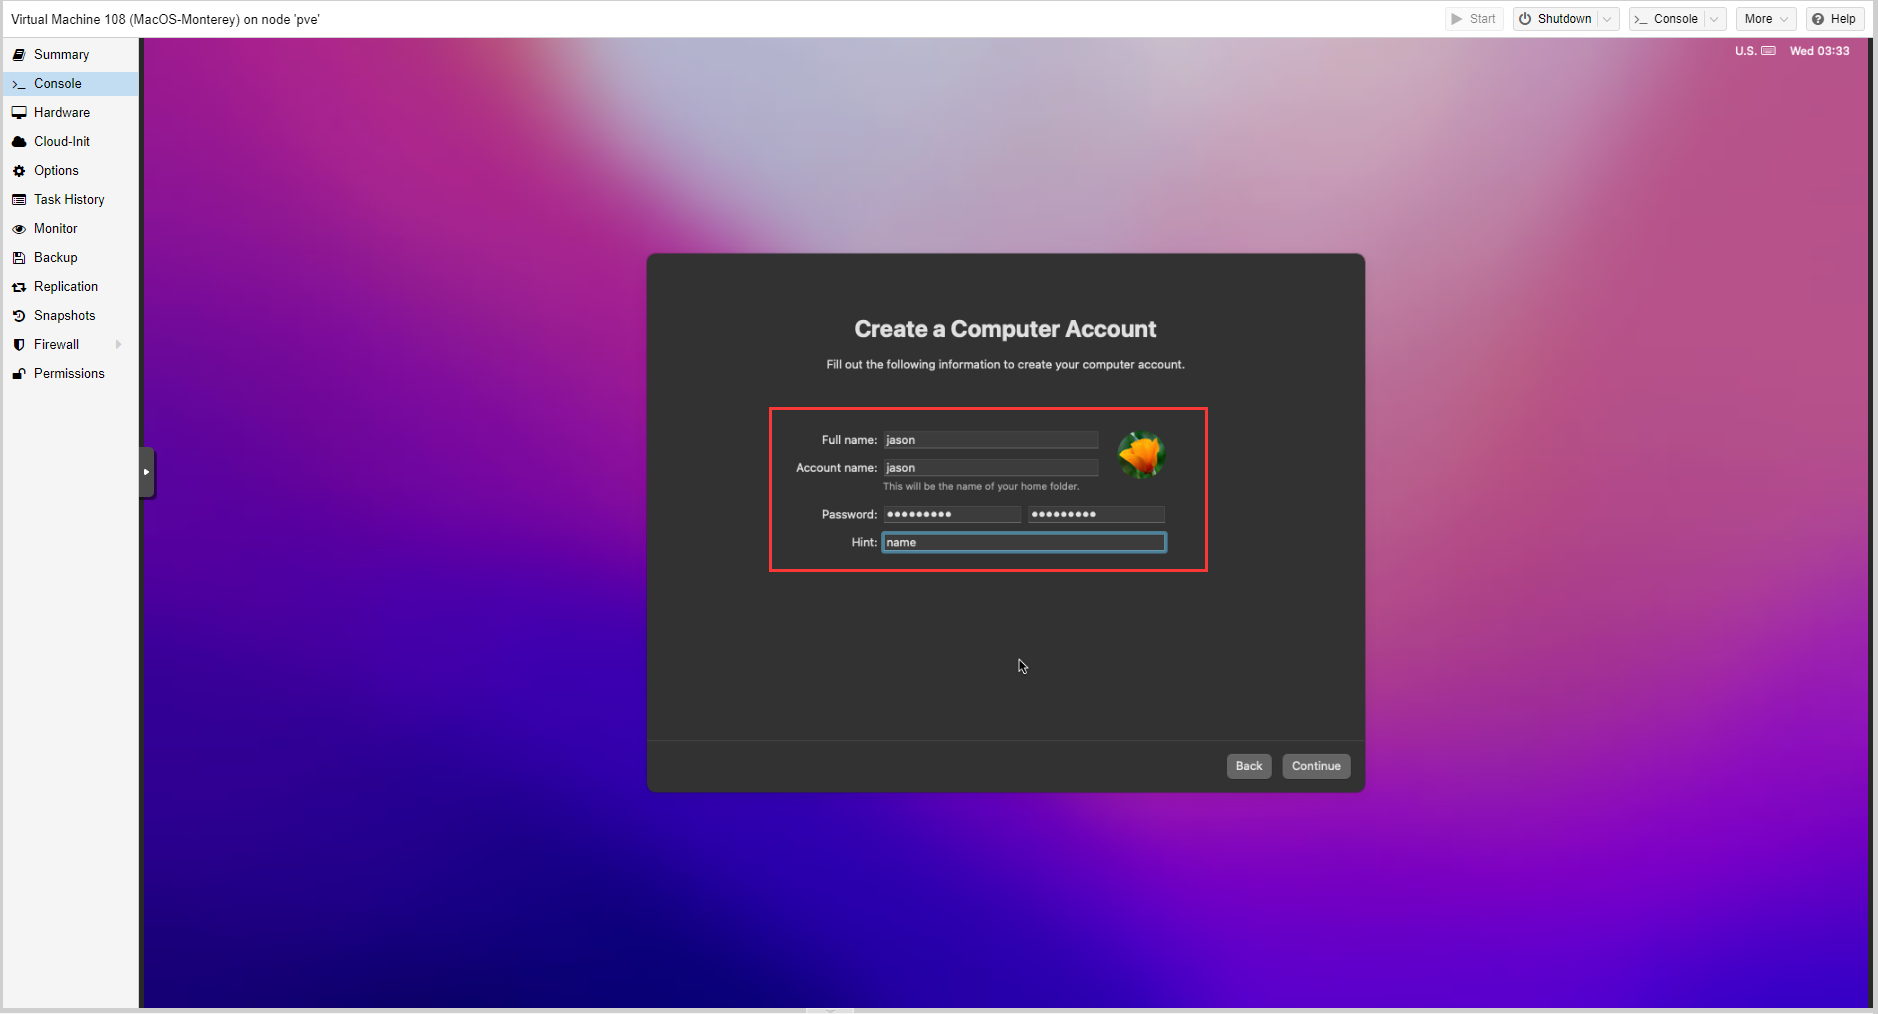
输入mac系统的账号和密码。点击继续。
点击继续。

点击继续。
点击继续。
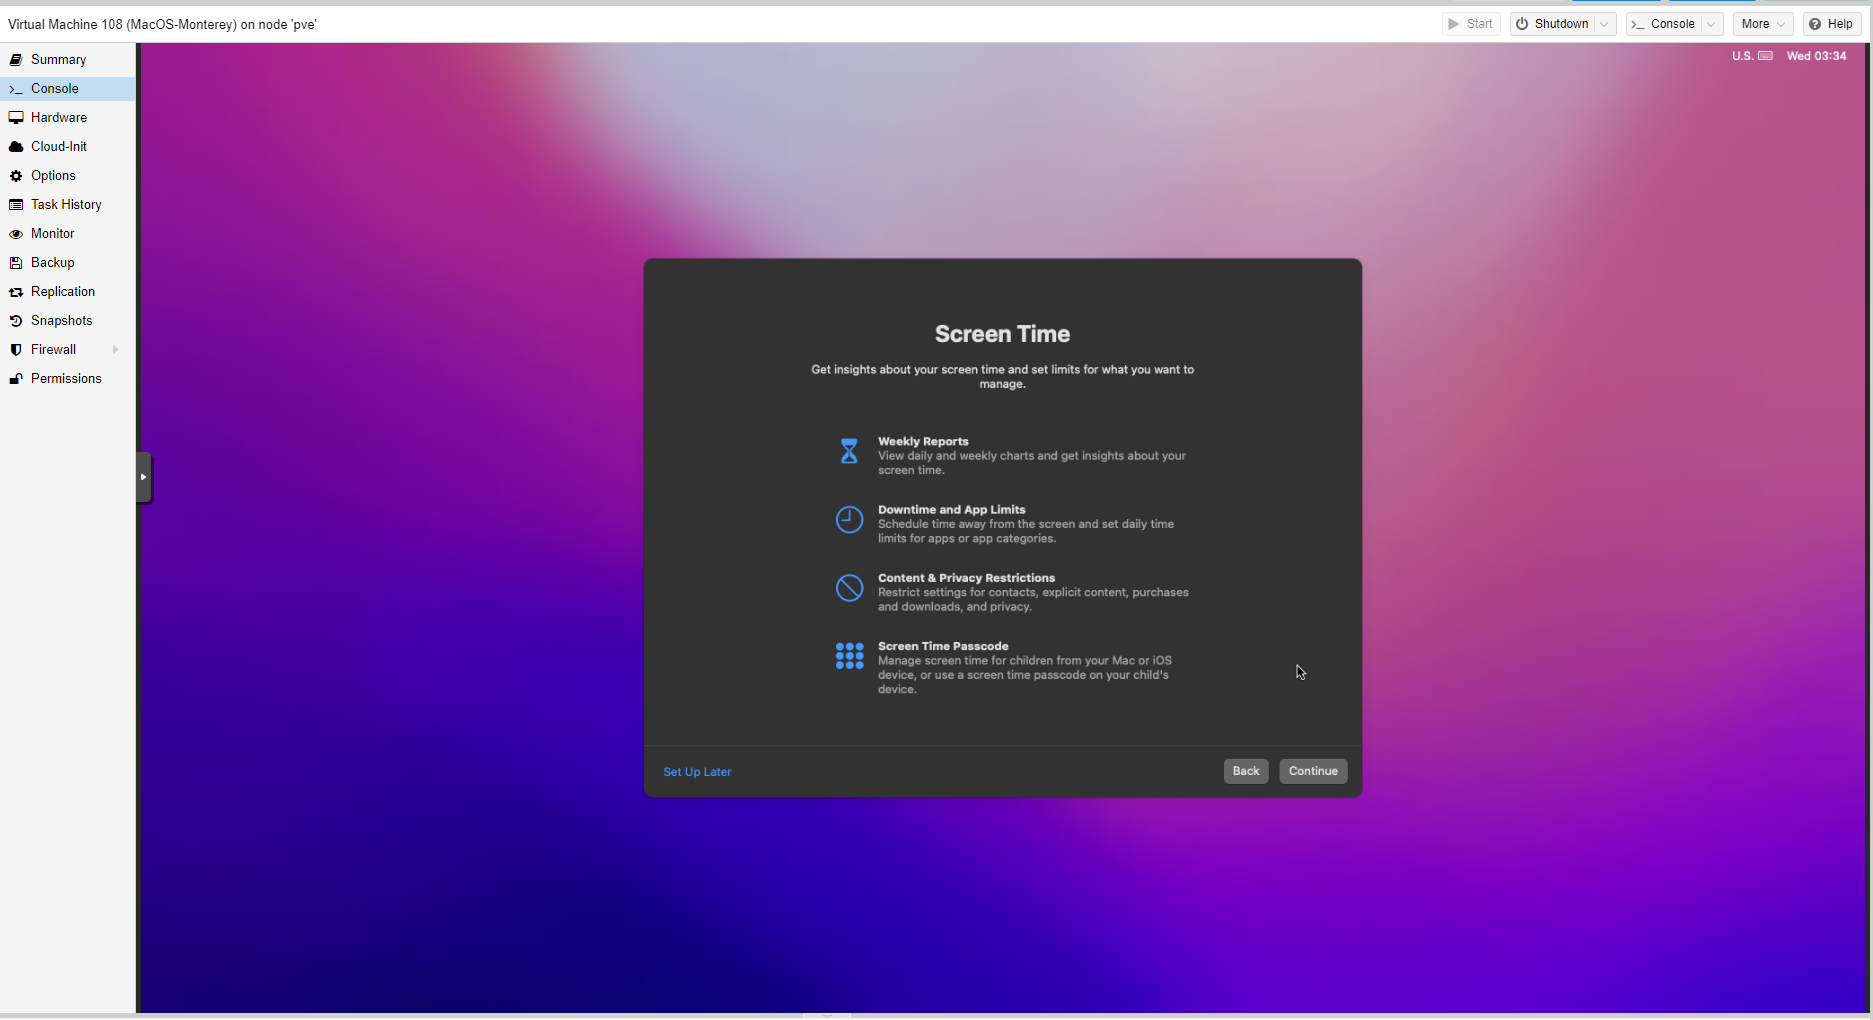
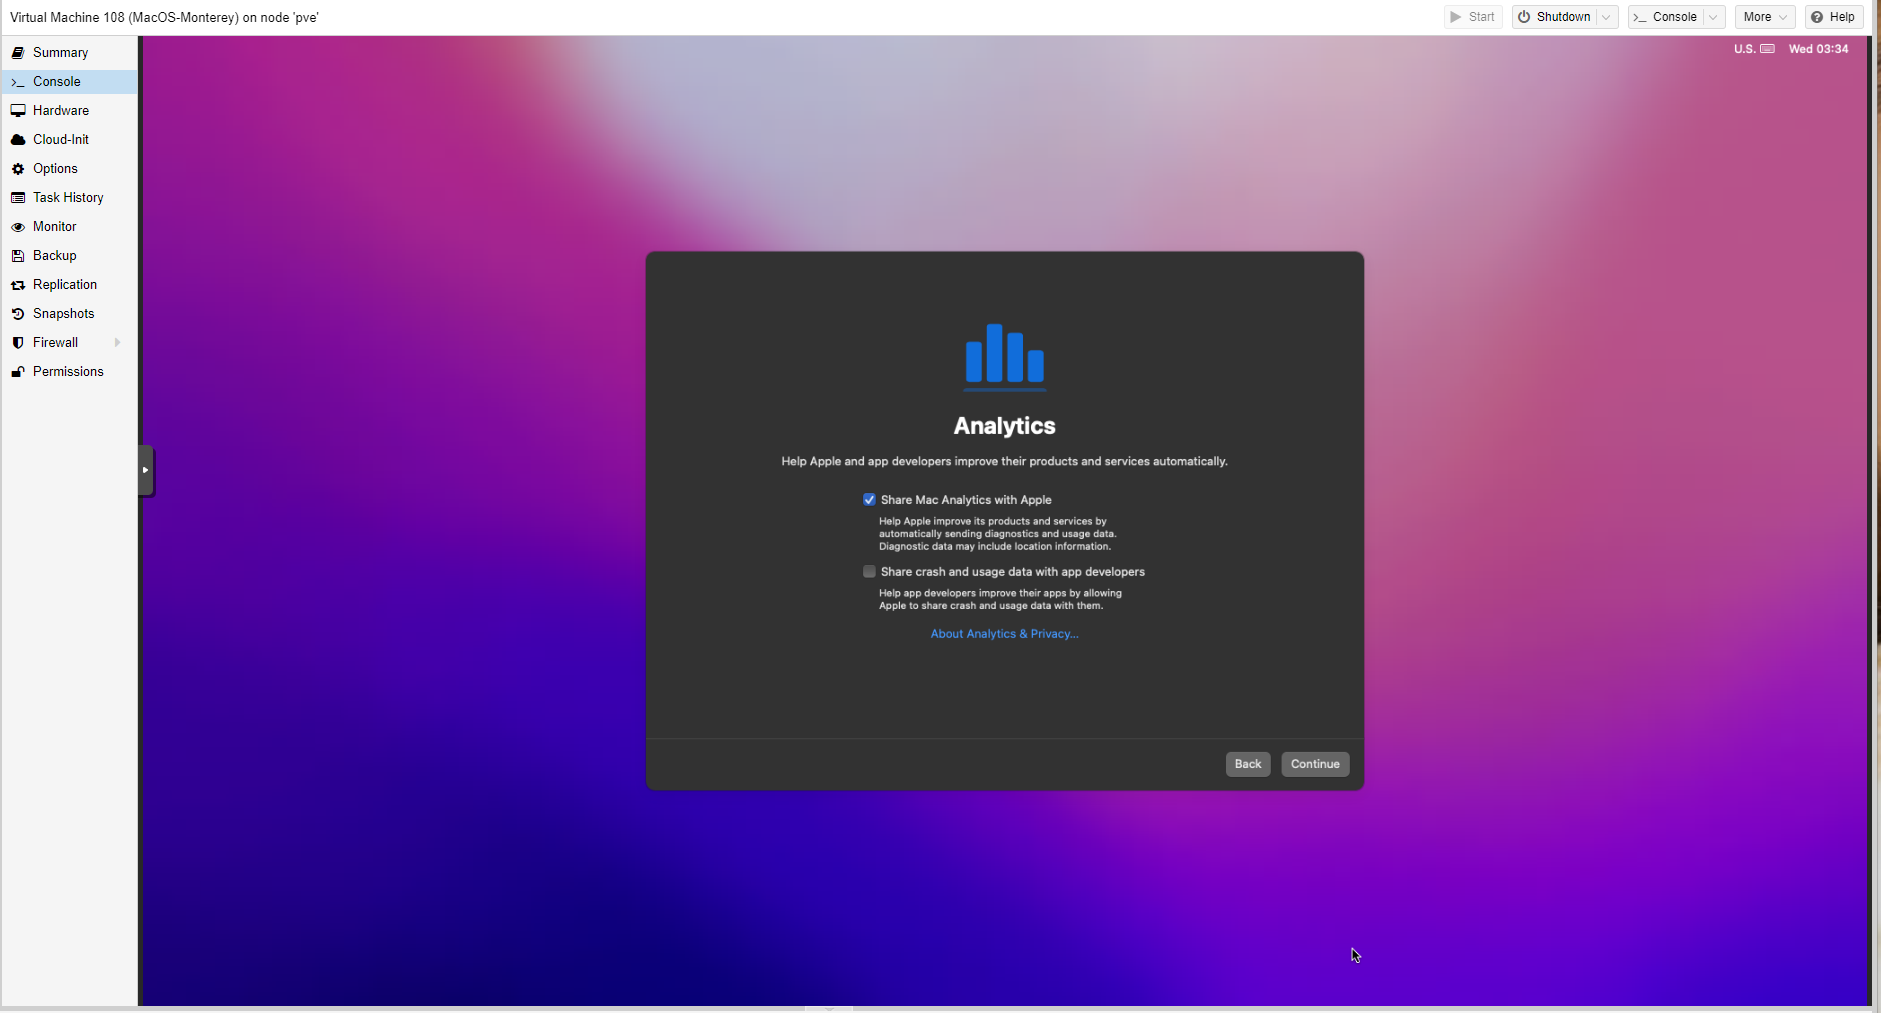
点击继续。
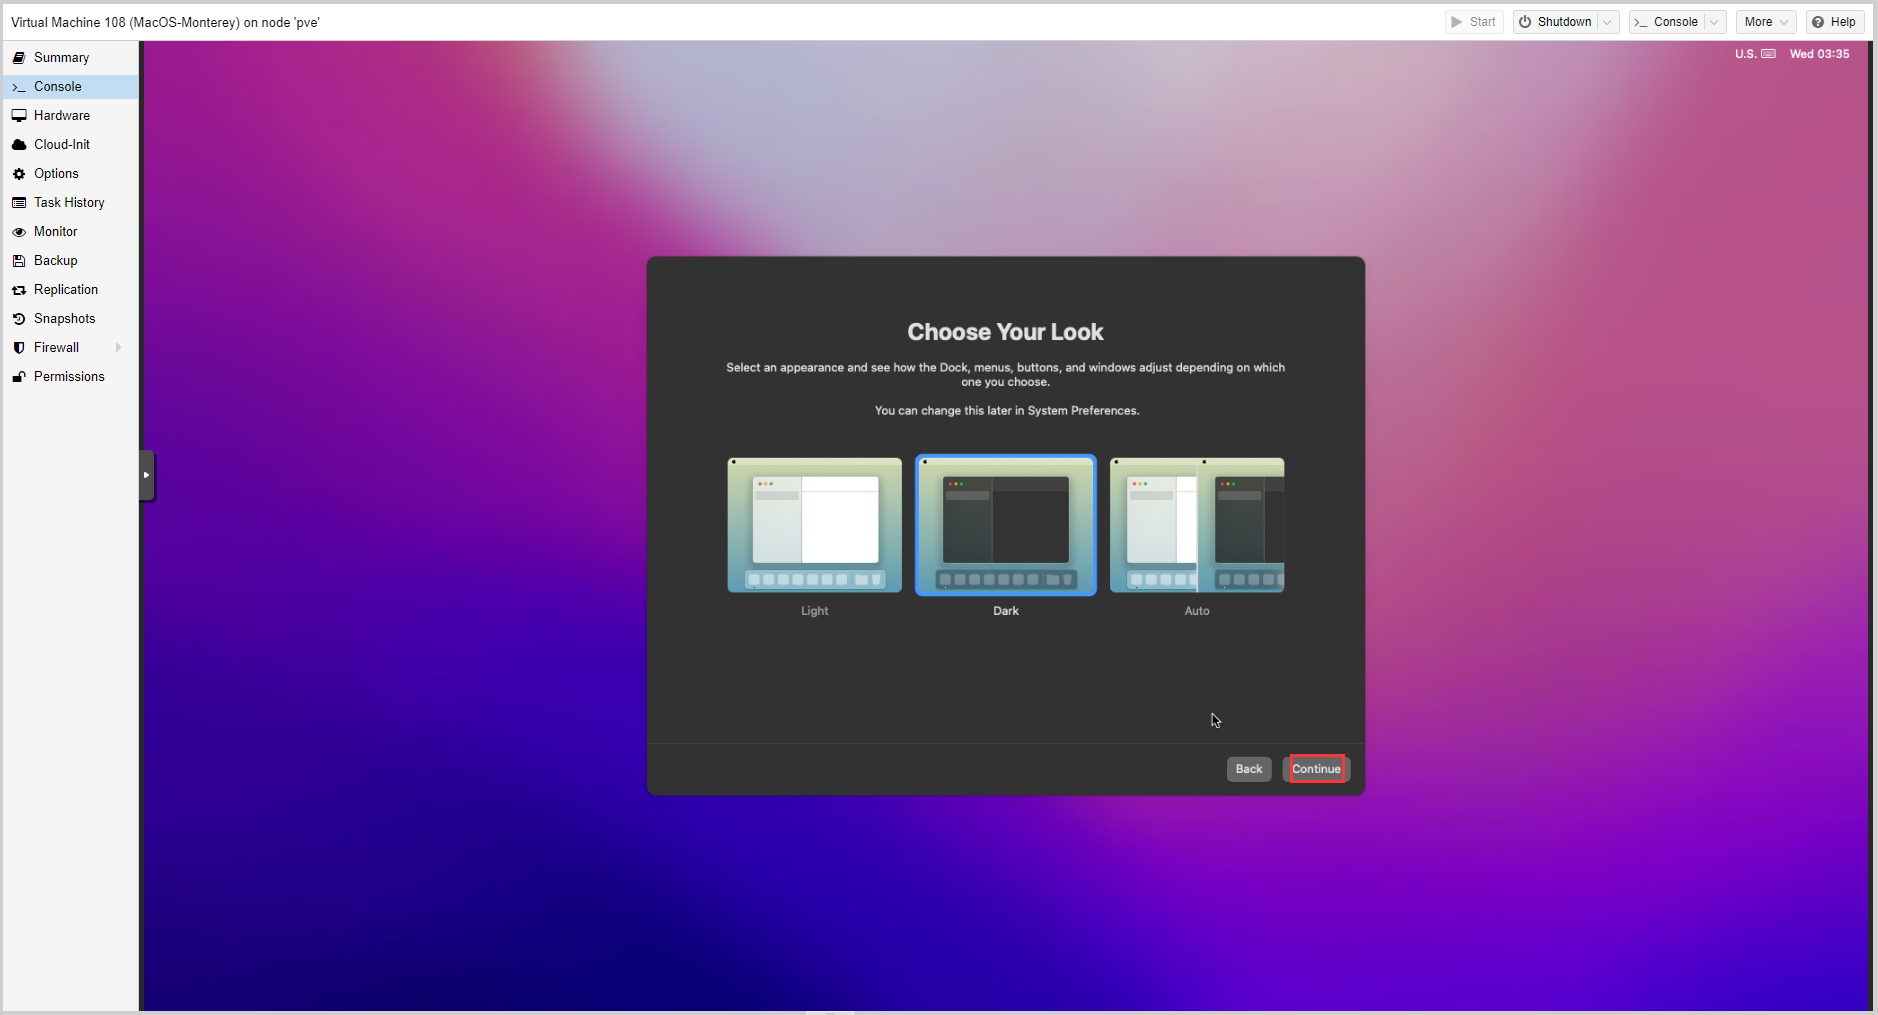
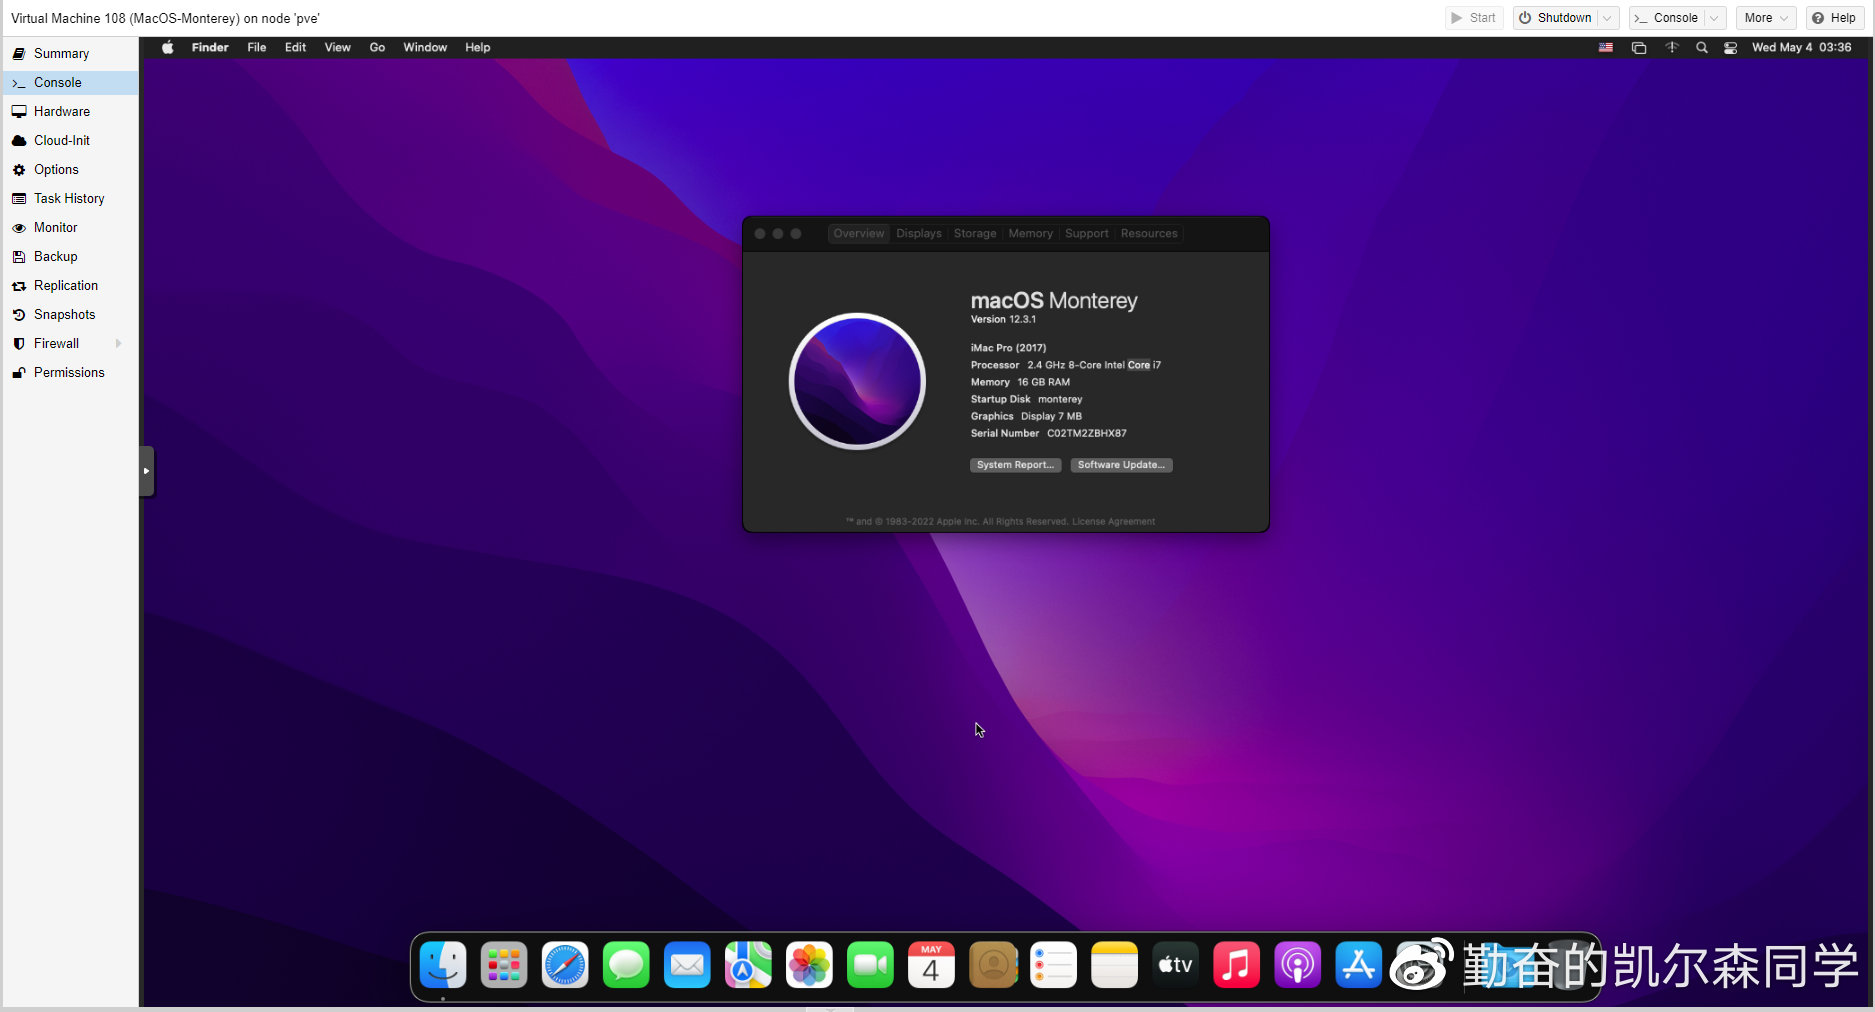
这样就进入到Mac系统的页面啦。

版本系统如下。
也可以在PVE的硬件设置选项卡,设置硬件直通,比如显卡、USB、声卡等直通给mac,就可以当做主力机使用了。
大功告成,enjoy it。
发布于 上海
相关文章